I’ve quoted it here for completeness. Thx
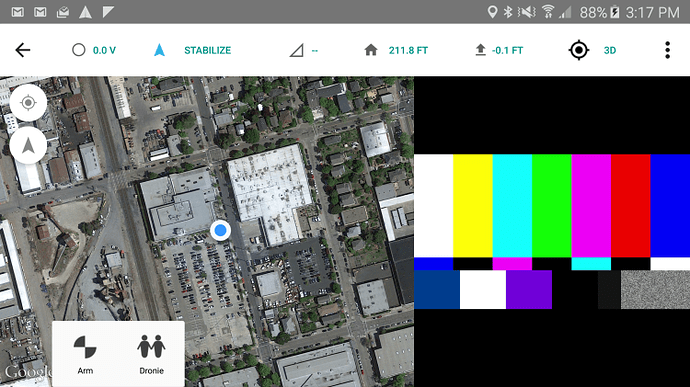
I am reporting how to stream Raspberry pi camera video to Tower video widget.
On the last weekend, I attended a drone meeting. I brought my IRIS which was given from my friend. It flew well and I was very satisfied with my first flight. In the meeting, other people brought their brand new drones like SOLO, Phantom, and Inspire. I had a chance to fly them and I felt something was missing in my old IRIS. It was FPV! I live in Japan and because of a regulation, we can't use a 5.8GHz video transmitter without a licence. Furthermore, SOLO costs twice as in USA. However, I noticed a video widget(small screen) in Android "Tower" app and it was said that it receive custom video streaming. In that article, the author used Ubuntu as the source. Since I had a raspberry pi 2 with pi camera, I had tried to use it as a FPV camera server. The followings are how to set up video streaming. I hope it will work with your environment.
1. Set up raspberry pi for streaming video
From the shell type the commands in the following post or clone a repo. to execute the srcript
Install gstreamer and enable hardware h264 encoding with gstreamer on the Raspberry Pi
2. Enable a camera module
Type
$ sudo raspi-config
From the menu, Select "Enable camera" and then select "Enable".
If you already did it. You can move to the next step.
3. Start streaming
$ raspivid -n -t 0 -w 640 -h 360 -fps 24 -b 6000000 -o - | gst-launch-1.0 -e -vvvv fdsrc ! h264parse ! rtph264pay pt=96 config-interval=5 ! udpsink host=192.168.3.11 port=9000
You should configure an address of the host and port. The address is the clients(an android tablet)' IP address. You can change port number. You can change the resolution of the video -w: wide -h: height. There are so many parameters to control the video format.
4. Show video on Tower widget
Please follow the instruction here.
You need to set the port number as same as the one specified above.
You only have video while connecting to your pixhawk.
Now you can watch a flight data and video footage on a same screen as the latest drones!
On Wifi network, latency was not unbearable. I hope to install a raspi on my IRIS soon.
In a future, I would like to use 4G/LTE network for telemetry and video streaming.
note: The current supply of the usb ports of a raspberry pi is limited. It is better to supply external power to wifi or 4G/LTE usb dongle or the system may hang up soon or later.
You may need to install rpicamsrc
Thanks!
