Previous conversions of the Convergence to ArduPilot have used the Pixhawk1 flight controller (E-flight converge default file, E-flight Convergence demo in Hokkaido), but the airframe is rather small, and a PixRacer fits more easily.
The PixRacer has only 6 PWM outputs, and the Convergence needs 7 (3 ESCs and 4 servos). But the PixRacer does have a spare UART in typical configurations… and a UART can be used for SBUS output with capacity for up to 16 additional PWM outputs.
Onboard video of hover testing shows that roll, pitch and yaw control are pretty good with the current tuning:
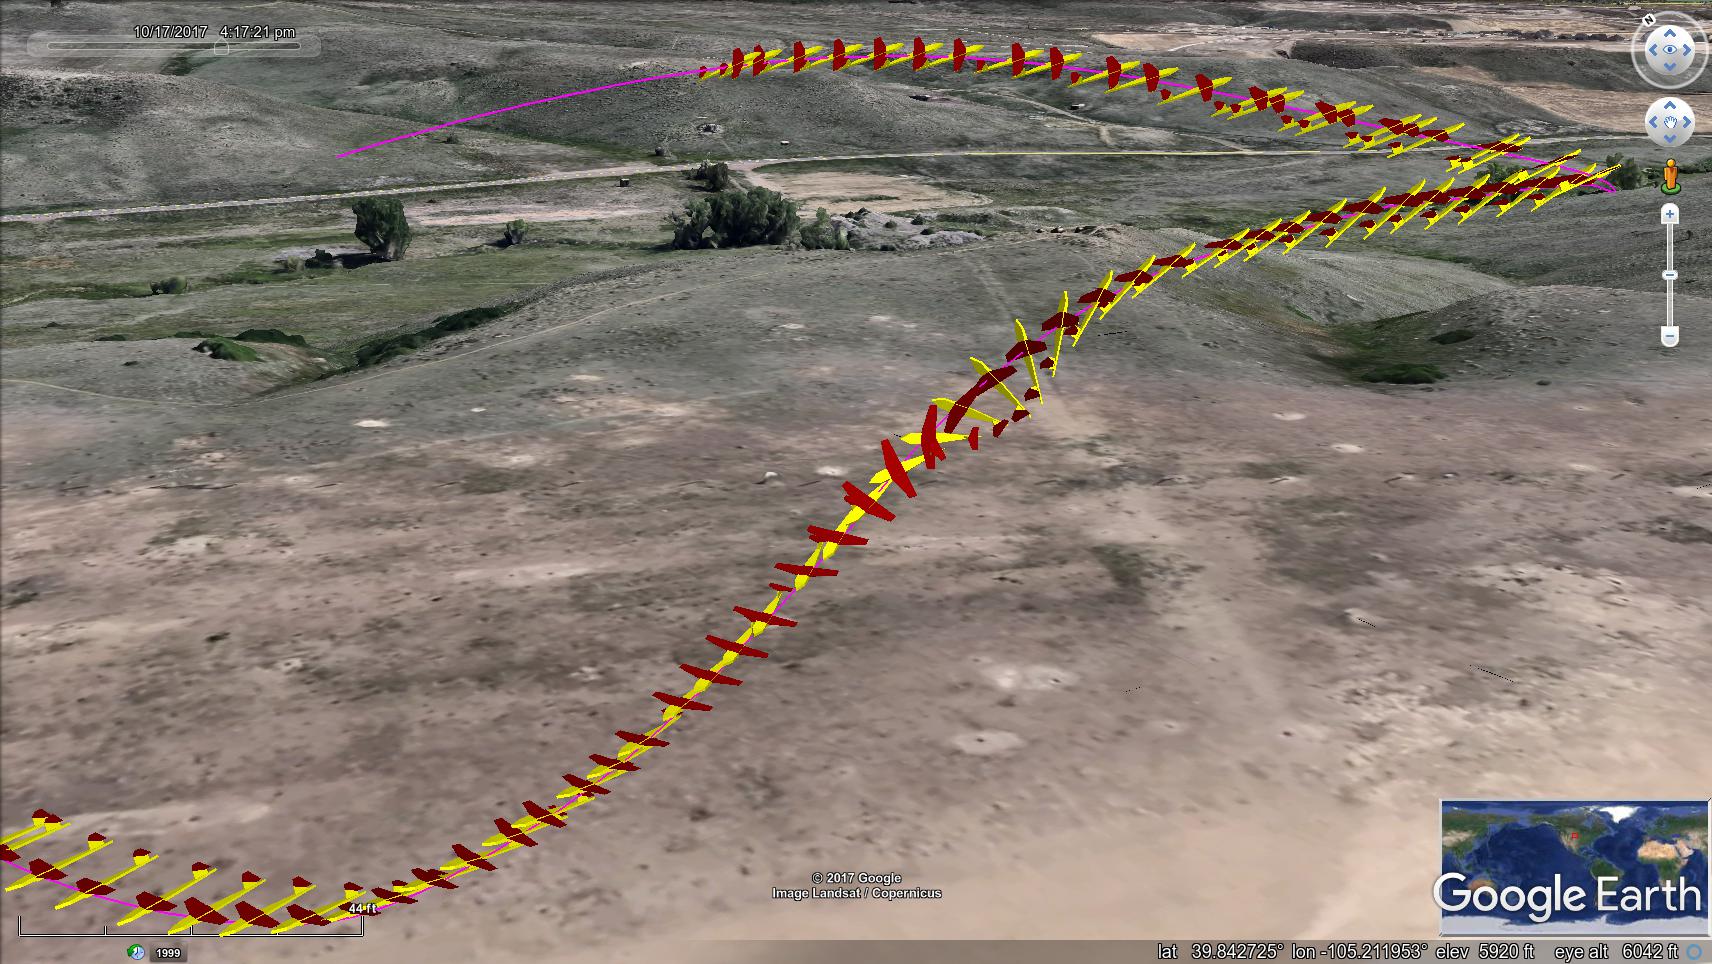
Onboard video of flight with forward/backward transitions:
Onboard video of full auto mission:
This is what happens when you try to fly backwards too fast:
This project adds SBUS output capability to the FMUv4 build of ArduPilot:
and uses a 4-channel FrSky SBUS to PWM converter to provide 4 additional servo outputs on the PixRacer.
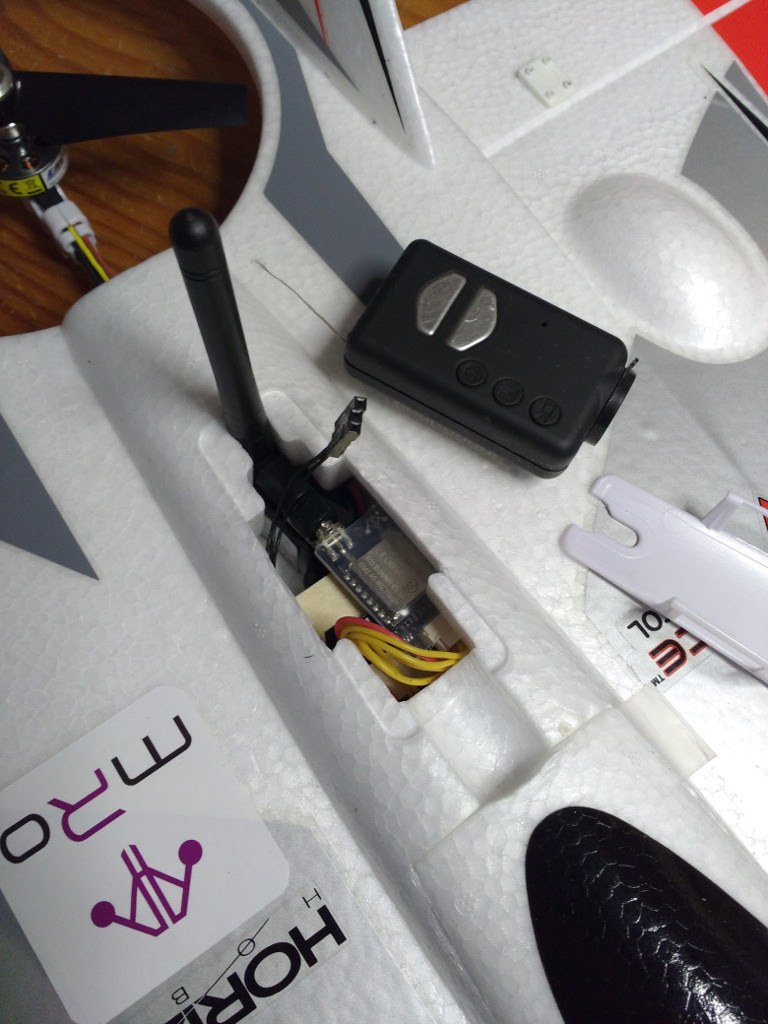
The flight controller, receiver and sbus converter replace the original electronics in the belly of the plane:
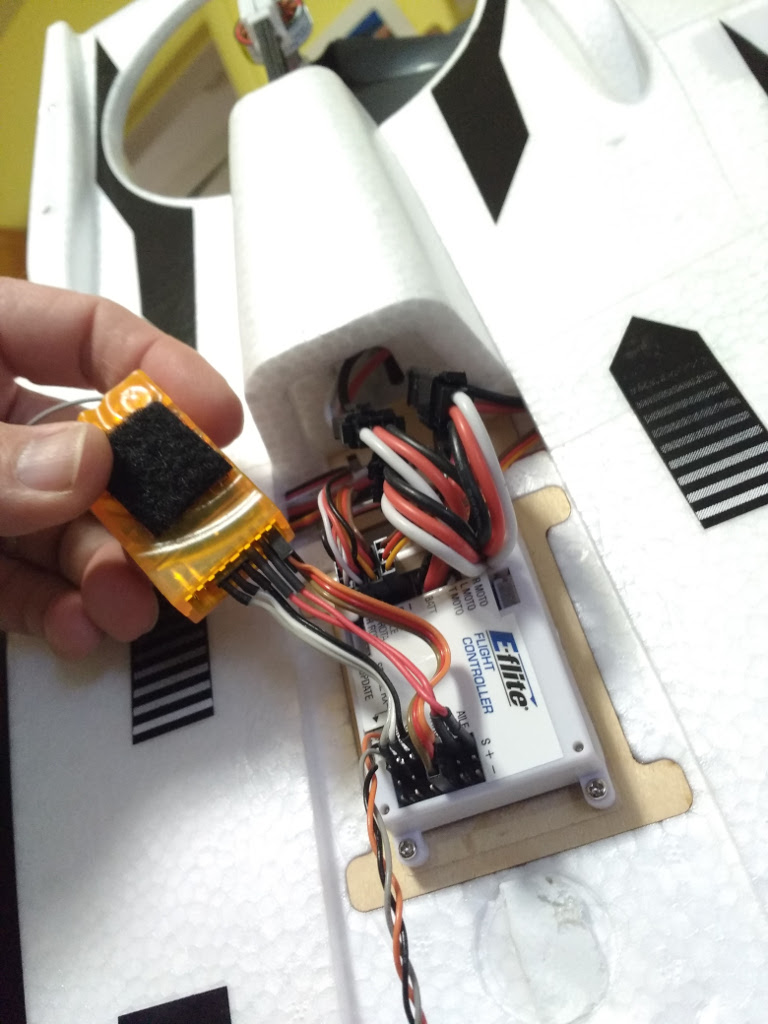
PixRacer, SBUS decoder and FrSky XSR receiver installed using servo tape:

closed up:
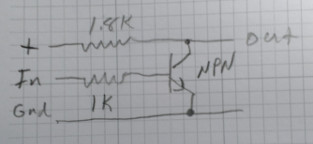
The SBUS converter is connected to the Telem2 port using an inverting cable with a 2N2222 transistor:
The Telem1 port is connected to an mRobotics 8266 WiFi module for GCS communication:
https://store.mrobotics.io/mRo-WiFi-Module-V1-0-ESP8266-p/mro-esp8266v1-mr.htm
My configuration places the three motors on servo channels 9-11 and the SBUS decoder is programmed to output channels 9-12 on its 4 sets of pins. Beware that my SBUS decoders are generating an output PWM rate of 168Hz, and this can damage analog servos. That is the main reason I am using the SBUS output only for ESCs and not servos (the stock Convergence servos are analog).
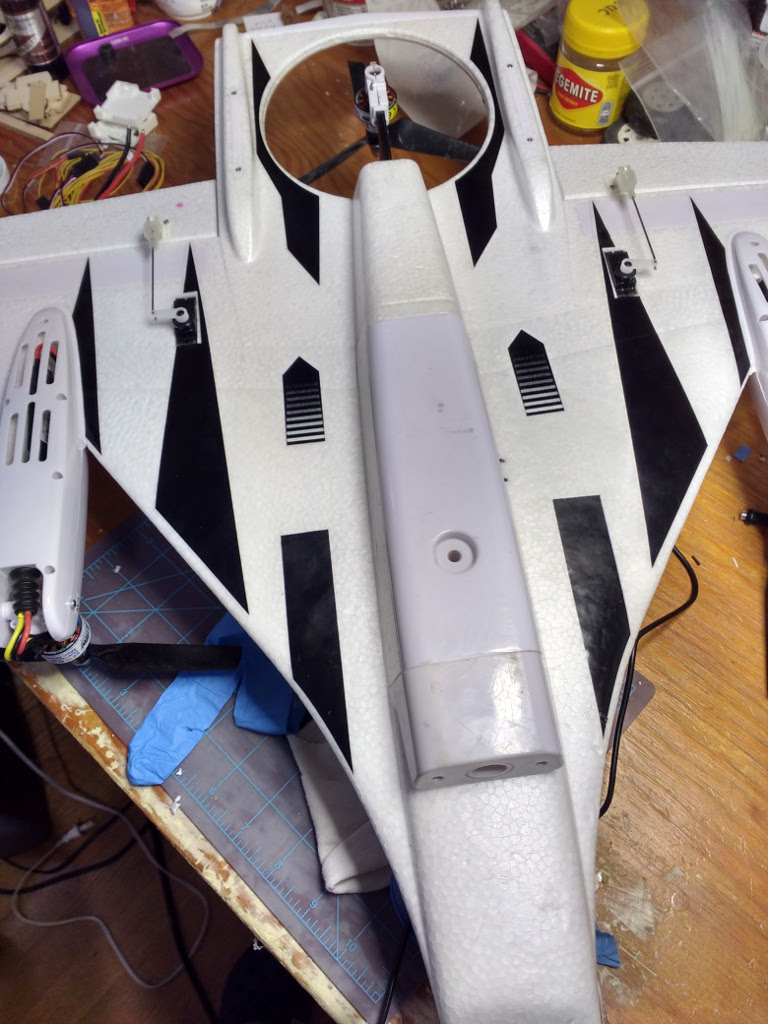
As Tridge noted in his build log, beware that the black and white wire colors for the ESCs are swapped at the connector between the nacelle and controller compartment:
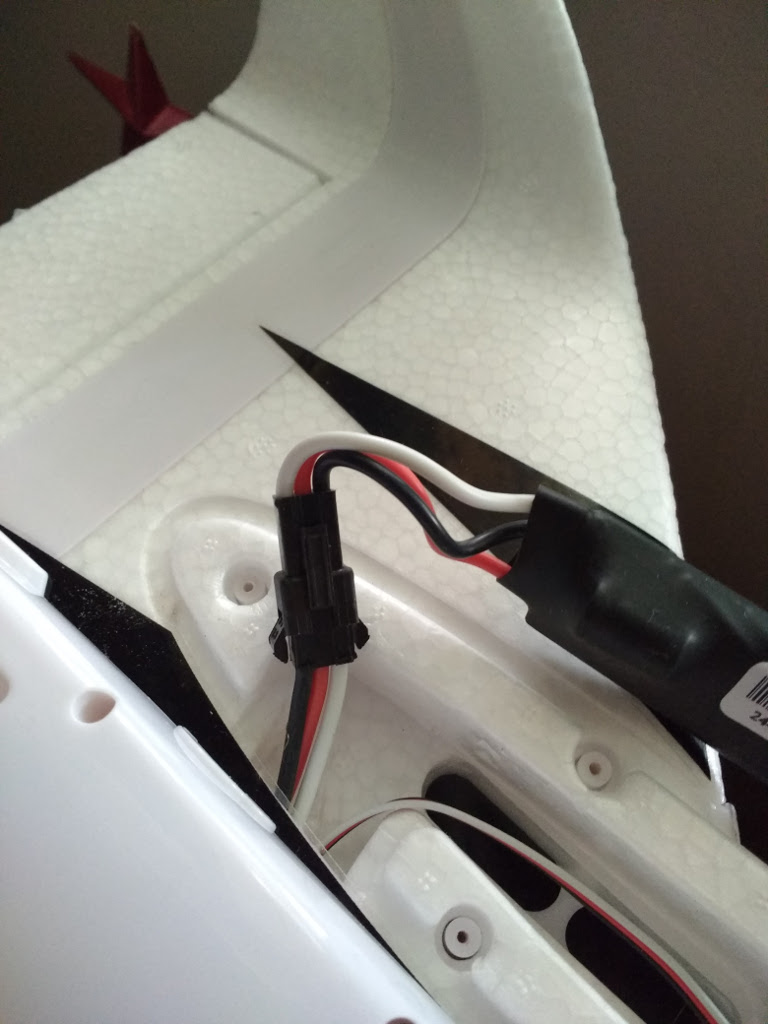
I rearranged the wires in the stock connectors to maintain black for ground and white for PWM signal all the way from the ESC to the controller.
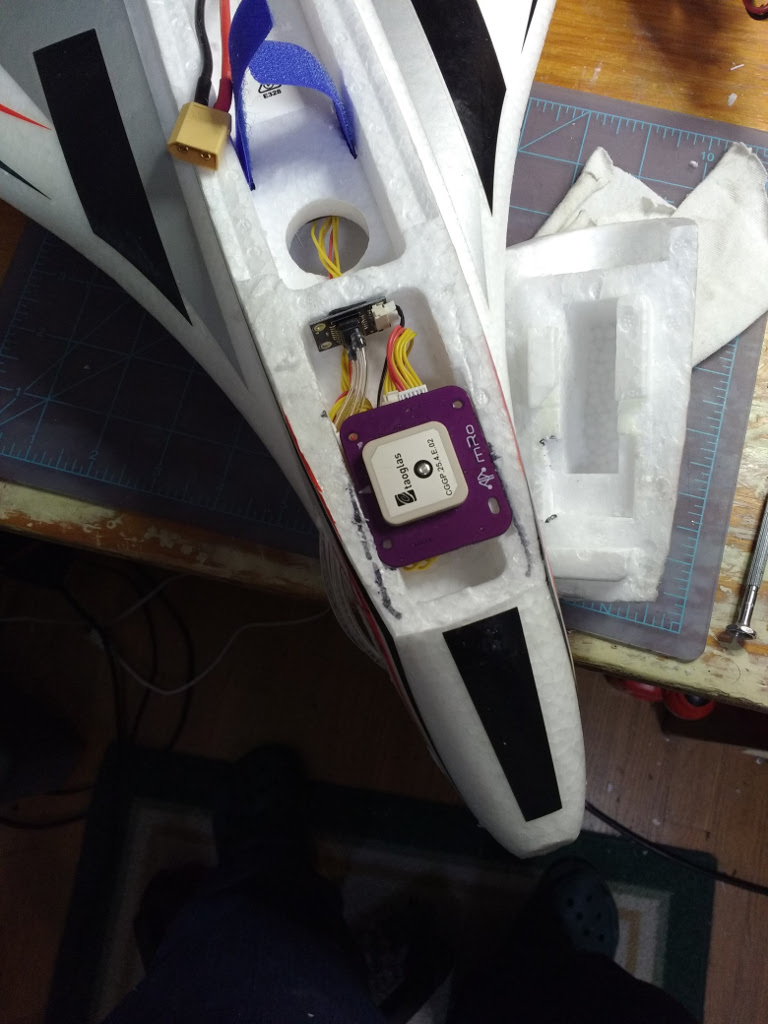
There’s a fair amount of usable space inside the forward cockpit area (the top half is a separate glued-on piece of foam). I cut through the glue joints, to access that space and installed the GPS and airspeed sensor inside.
The canopy is easily reinstalled using a few strips of clear packing tape instead of glue.

Log and plots from flight test in modes QSTABILIZE, QHOVER and QLOITER:
https://drive.google.com/open?id=0Bw3digSMQXDud2tJRmxIdVJINE0
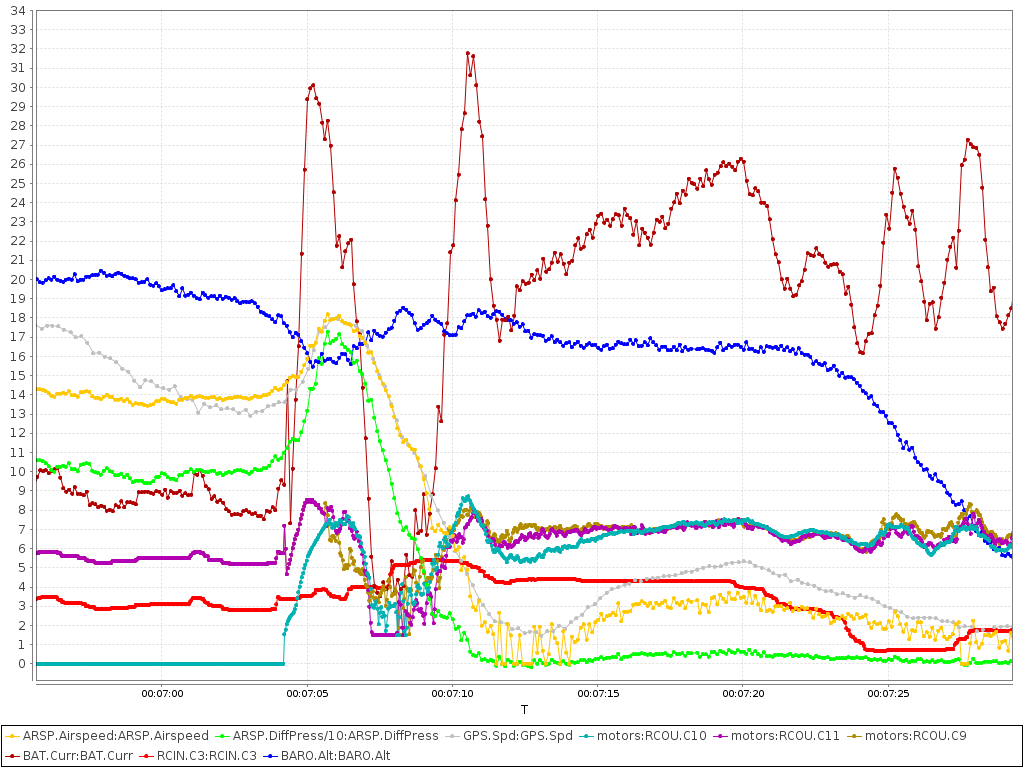
Plot of transition to forward flight; rear motor shuts off at airspeed of 20 m/sec
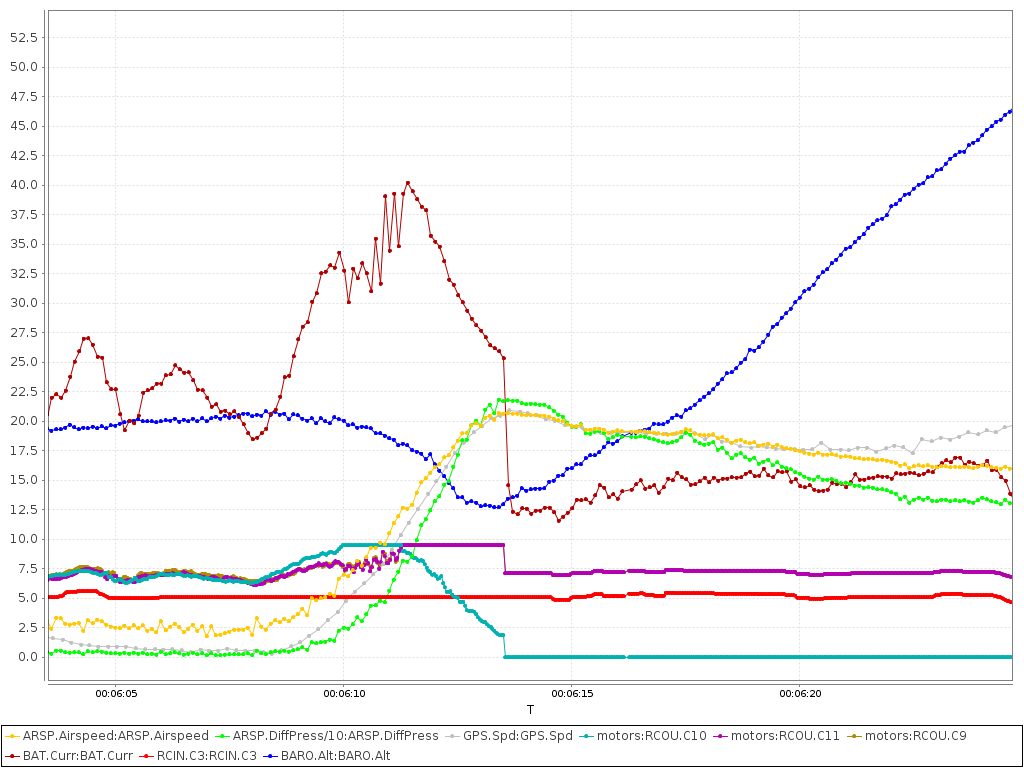
Plot of transition from forward flight back to hover; airspeed is near zero after about 7 seconds: