I think you’re using the wrong port.
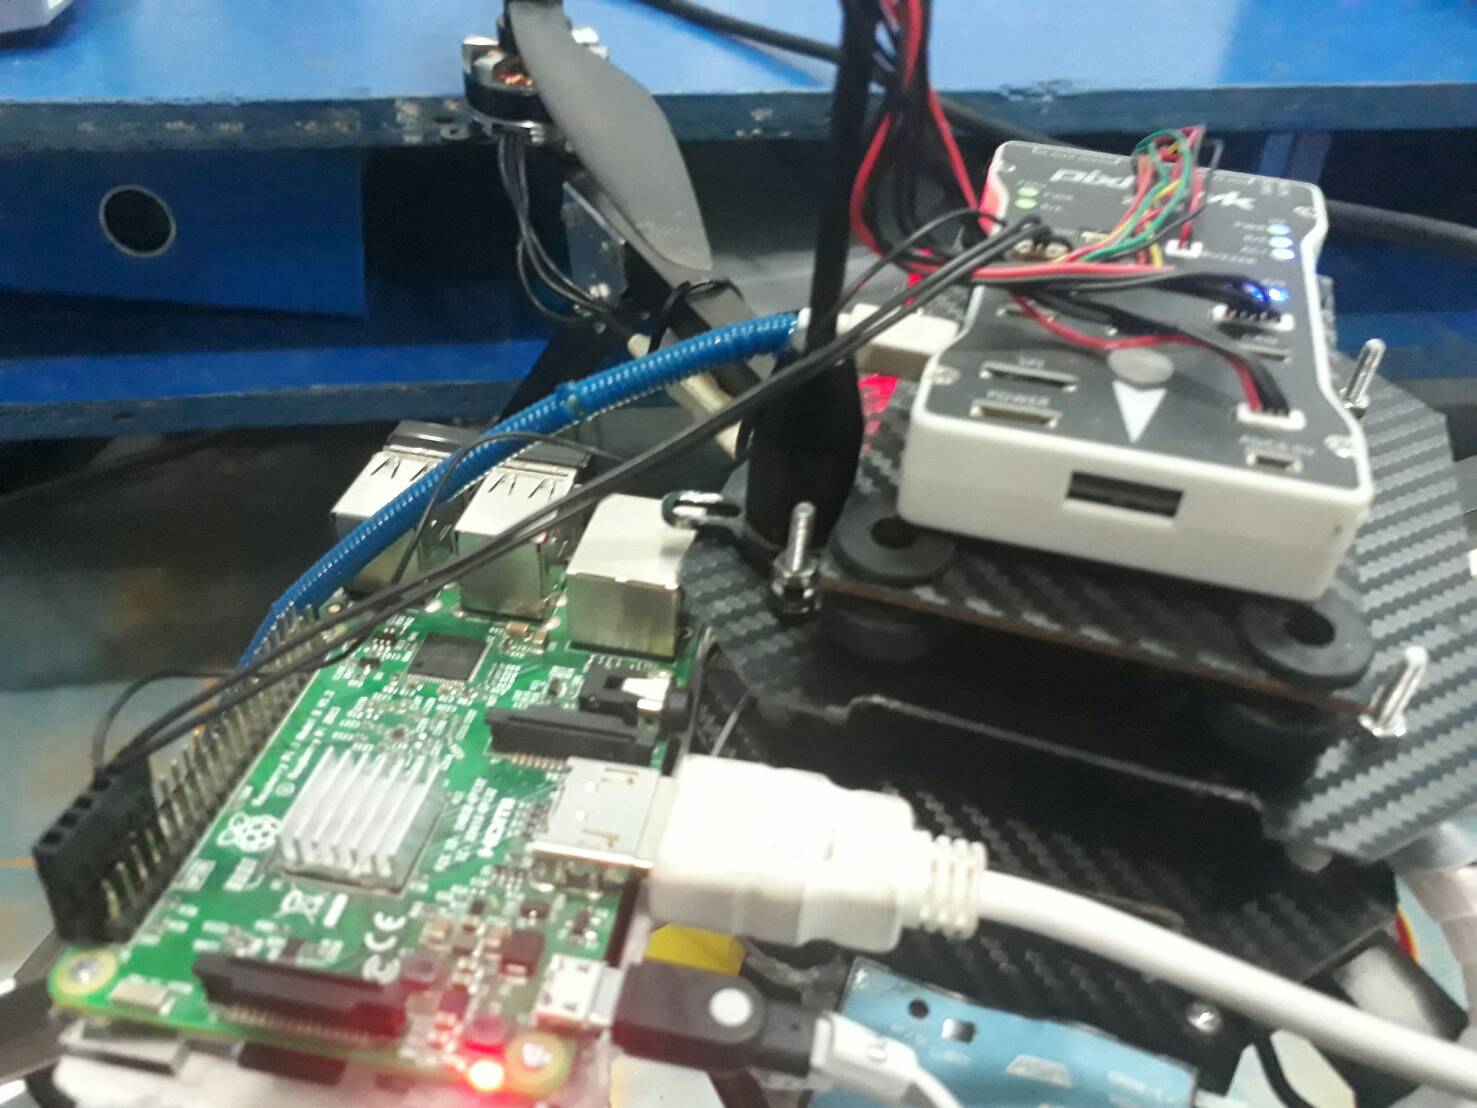
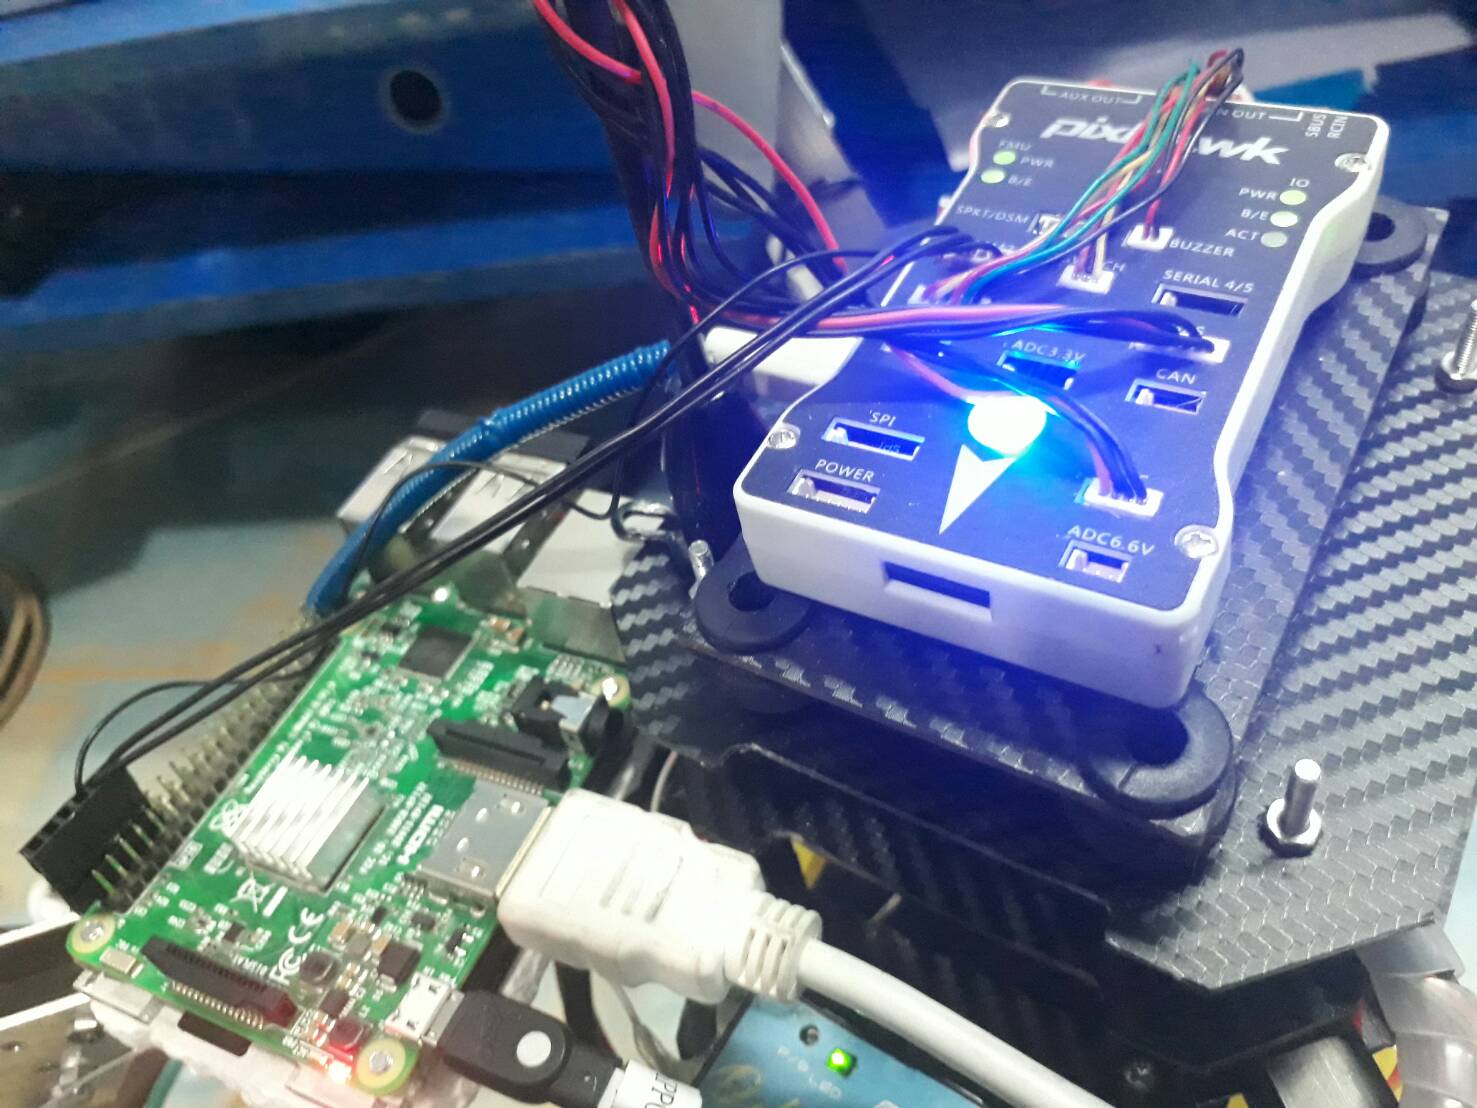
On the raspberry pi, where do you have the connection? Make a photo so we can see the setup clearly!
I think you’re using the wrong port.
On the raspberry pi, where do you have the connection? Make a photo so we can see the setup clearly!
Thanks. Now please tell us how you’ve configured the raspberry PI itself?
It’s improtant to know if you’ve setup your serial port on the raspberry pi.
dwc_otg.lpm_enable=0 console=tty1 root=PARTUUID=4d68df1c-02 rootfstype=ext4 elevator=deadline fsck.repair=yes rootwait quiet splash plymouth.ignore-serial-consoles
this is my cmdline
#hdmi_safe=1
politeknik
#disable_overscan=1
#overscan_left=16
#overscan_right=16
#overscan_top=16
#overscan_bottom=16
#overscan_left=16
#overscan_right=16
#overscan_top=16
#overscan_bottom=16
#framebuffer_width=1280
#framebuffer_height=720
#hdmi_force_hotplug=1
#hdmi_group=1
#hdmi_mode=1
#hdmi_drive=2
#config_hdmi_boost=4
#hdmi_drive=2
#config_hdmi_boost=4
#sdtv_mode=2
#arm_freq=800
#dtparam=i2c_arm=on
#dtparam=i2s=on
#dtparam=spi=on
#dtoverlay=pi3-disable-bt
dtparam=audio=on
start_x=1
gpu_mem=128
enable_uart=1
pi@raspberrypi:~ $ sudo -s
root@raspberrypi:/home/pi# mavproxy.py --master=/dev/ttyS0 --baudrate 57600 --aircraft MyCopter
Connect /dev/ttyS0 source_system=255
no script MyCopter/mavinit.scr
Log Directory: MyCopter/logs/2017-10-04/flight3
Telemetry log: MyCopter/logs/2017-10-04/flight3/flight.tlog
MAV> Waiting for heartbeat from /dev/ttyS0
Exception in thread main_loop:
Traceback (most recent call last):
File “/usr/lib/python2.7/threading.py”, line 810, in __bootstrap_inner
self.run()
File “/usr/lib/python2.7/threading.py”, line 763, in run
self.__target(*self.__args, **self.__kwargs)
File “/usr/local/bin/mavproxy.py”, line 751, in main_loop
master.wait_heartbeat()
File “/usr/local/lib/python2.7/dist-packages/pymavlink/mavutil.py”, line 386, in wait_heartbeat
return self.recv_match(type=‘HEARTBEAT’, blocking=blocking)
File “/usr/local/lib/python2.7/dist-packages/pymavlink/mavutil.py”, line 347, in recv_match
m = self.recv_msg()
File “/usr/local/lib/python2.7/dist-packages/pymavlink/mavutil.py”, line 310, in recv_msg
s = self.recv(n)
File “/usr/local/lib/python2.7/dist-packages/pymavlink/mavutil.py”, line 832, in recv
ret = self.port.read(n)
File “/usr/local/lib/python2.7/dist-packages/serial/serialposix.py”, line 501, in read
’device reports readiness to read but returned no data '
SerialException: device reports readiness to read but returned no data (device disconnected or multiple access on port?)
Thank you for respon 
It all looks ok.
My config is posted here: RaspberryPi3 and APM2.6 via MAVProxy
I do see some differences, so please check that.
What it looks like to me, on your end, is that ttyS0 is not there. which means there must be something on the raspberry not correct.
I use ttyS0 because ttyAMA0 is not responding.
It not processed.
that just direct me to
MAV>
MAV>
MAV>
not in mode STABILIZE>
Hi, pi3 has changed the uart access a bit because of the onboard bluetooth. In short, you need to disable the onboard bluetooth and reassign the exposed uart gpio back to the PL011 which has better timing at different clockspeeds. It’s then accessed as before on /dev/ttyAMA0.
Add this to /boot/config.txt:
enable_uart=1
dtoverlay=pi3-disable-bt
Then you should see the AMA0 in the tty devices using command ls /dev/tty*
Launch the Mavproxy using AMA0
sudo mavproxy.py --master=/dev/ttyAMA0 --baudrate 57600 --aircraft MyCopter
How to use command ls /dev/tty?
I don’t how to use it, could you teach me?
Ok.
Thank you for respon 
I don’t really unset what your asking…
There was a problem with the serial ports on RPI3. It was fixed in firmware recently. Do an rpi-update to get the fix. /dev/serial0 was being linked to /dev/ttyS0 in some cases, and the baud rate was being throttled. force_turbo=1 and/or cpu_arm=200 would fix the throttle issue, but /dev/serial0 was also added as a comsole in some cases. New udev rules and other logic now prevents this. I can post a link if necessary. The update fixed my Pixhawk to RPI3 issues.
Could you post a link to this? Thanks
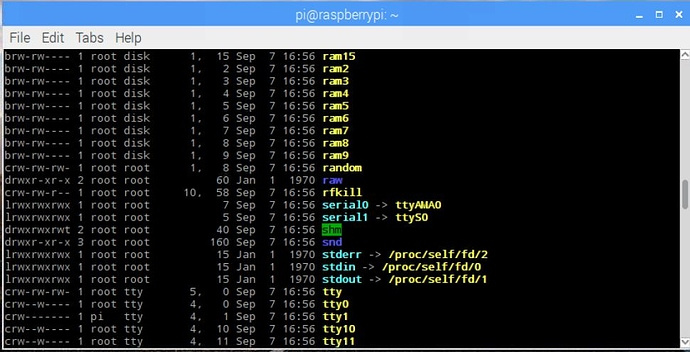
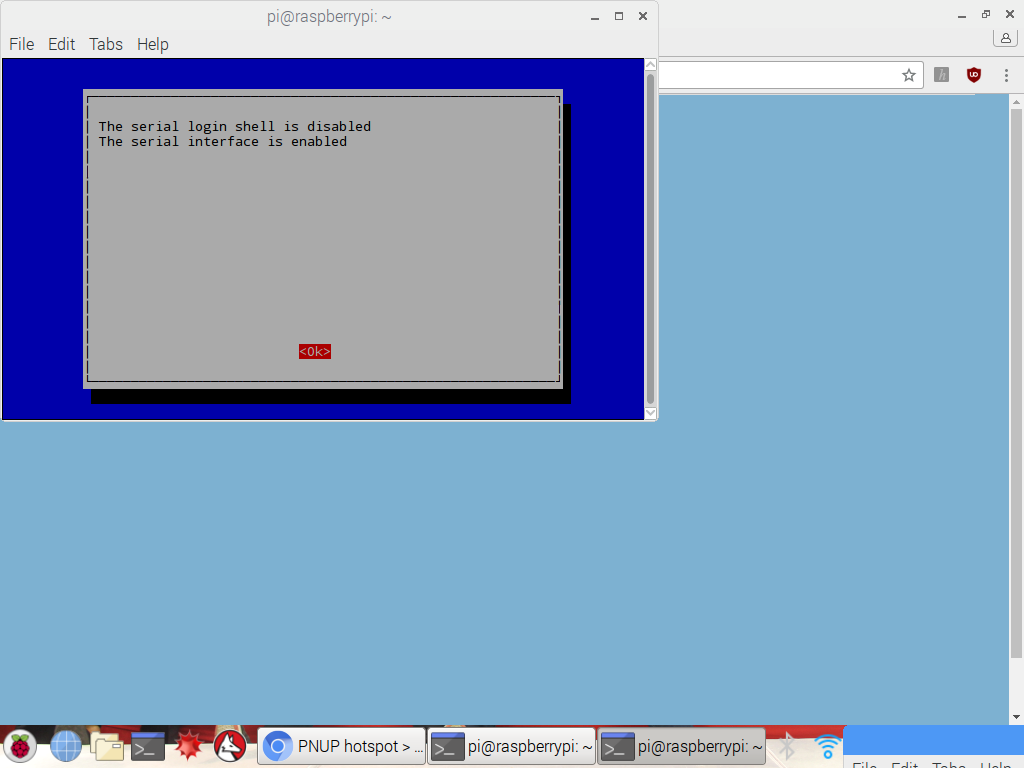
I want to display like that.But I don’t know how to display it in Raspi. I don’t know how to using ls -l /dev
I find this in a website, but I don’t know how to get “screen /dev/tty.PL2303-00004326 115200”