Here is the motor mount in case someone finds it useful: AliExpress 2750KV Motor Mount
2 Likes
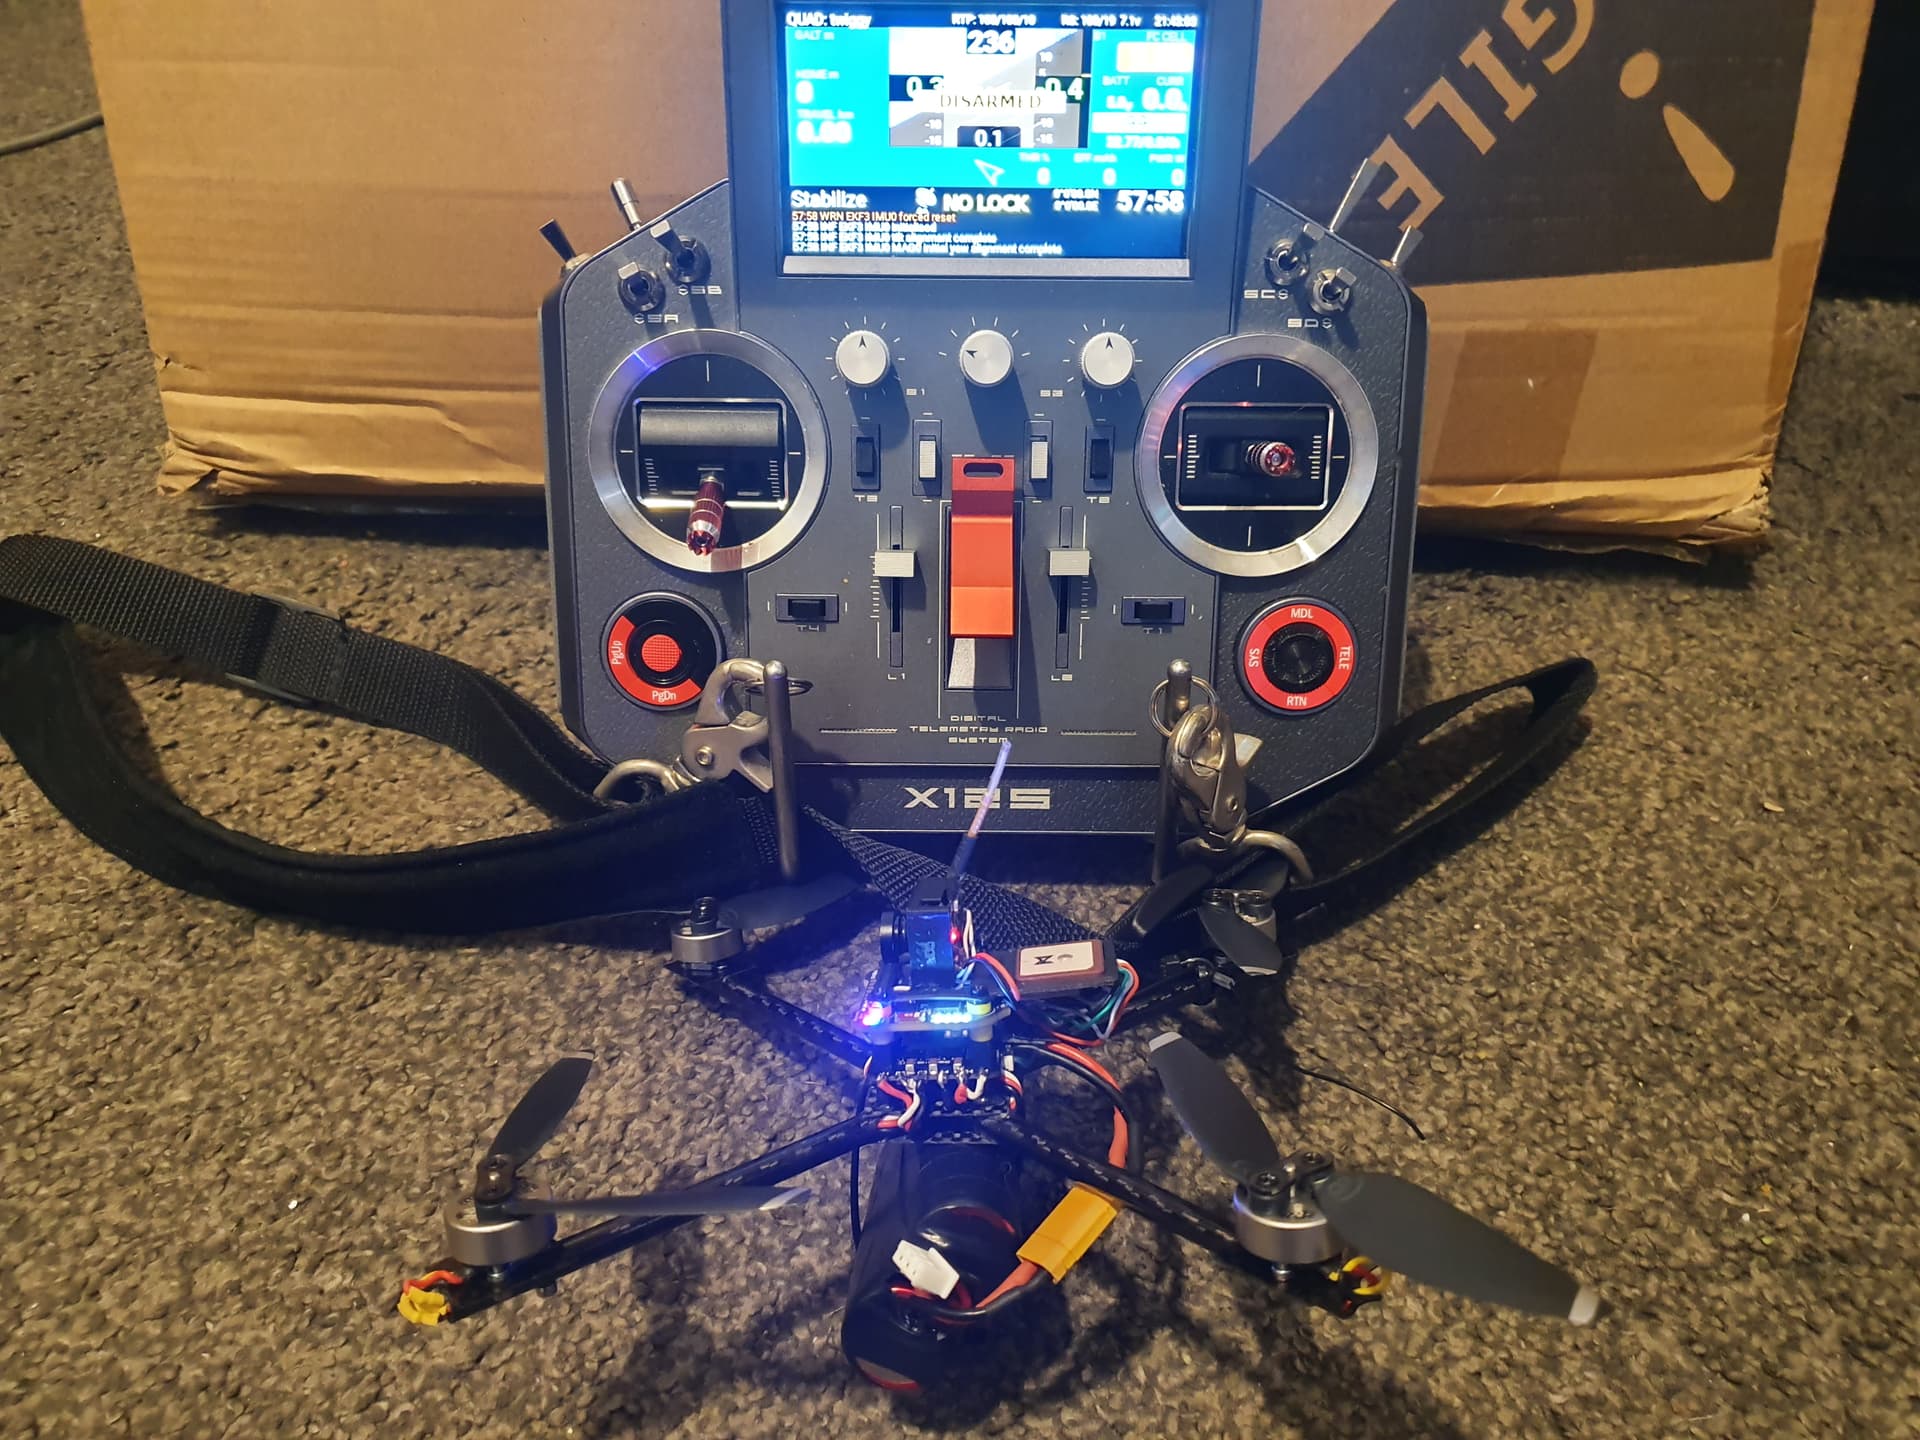
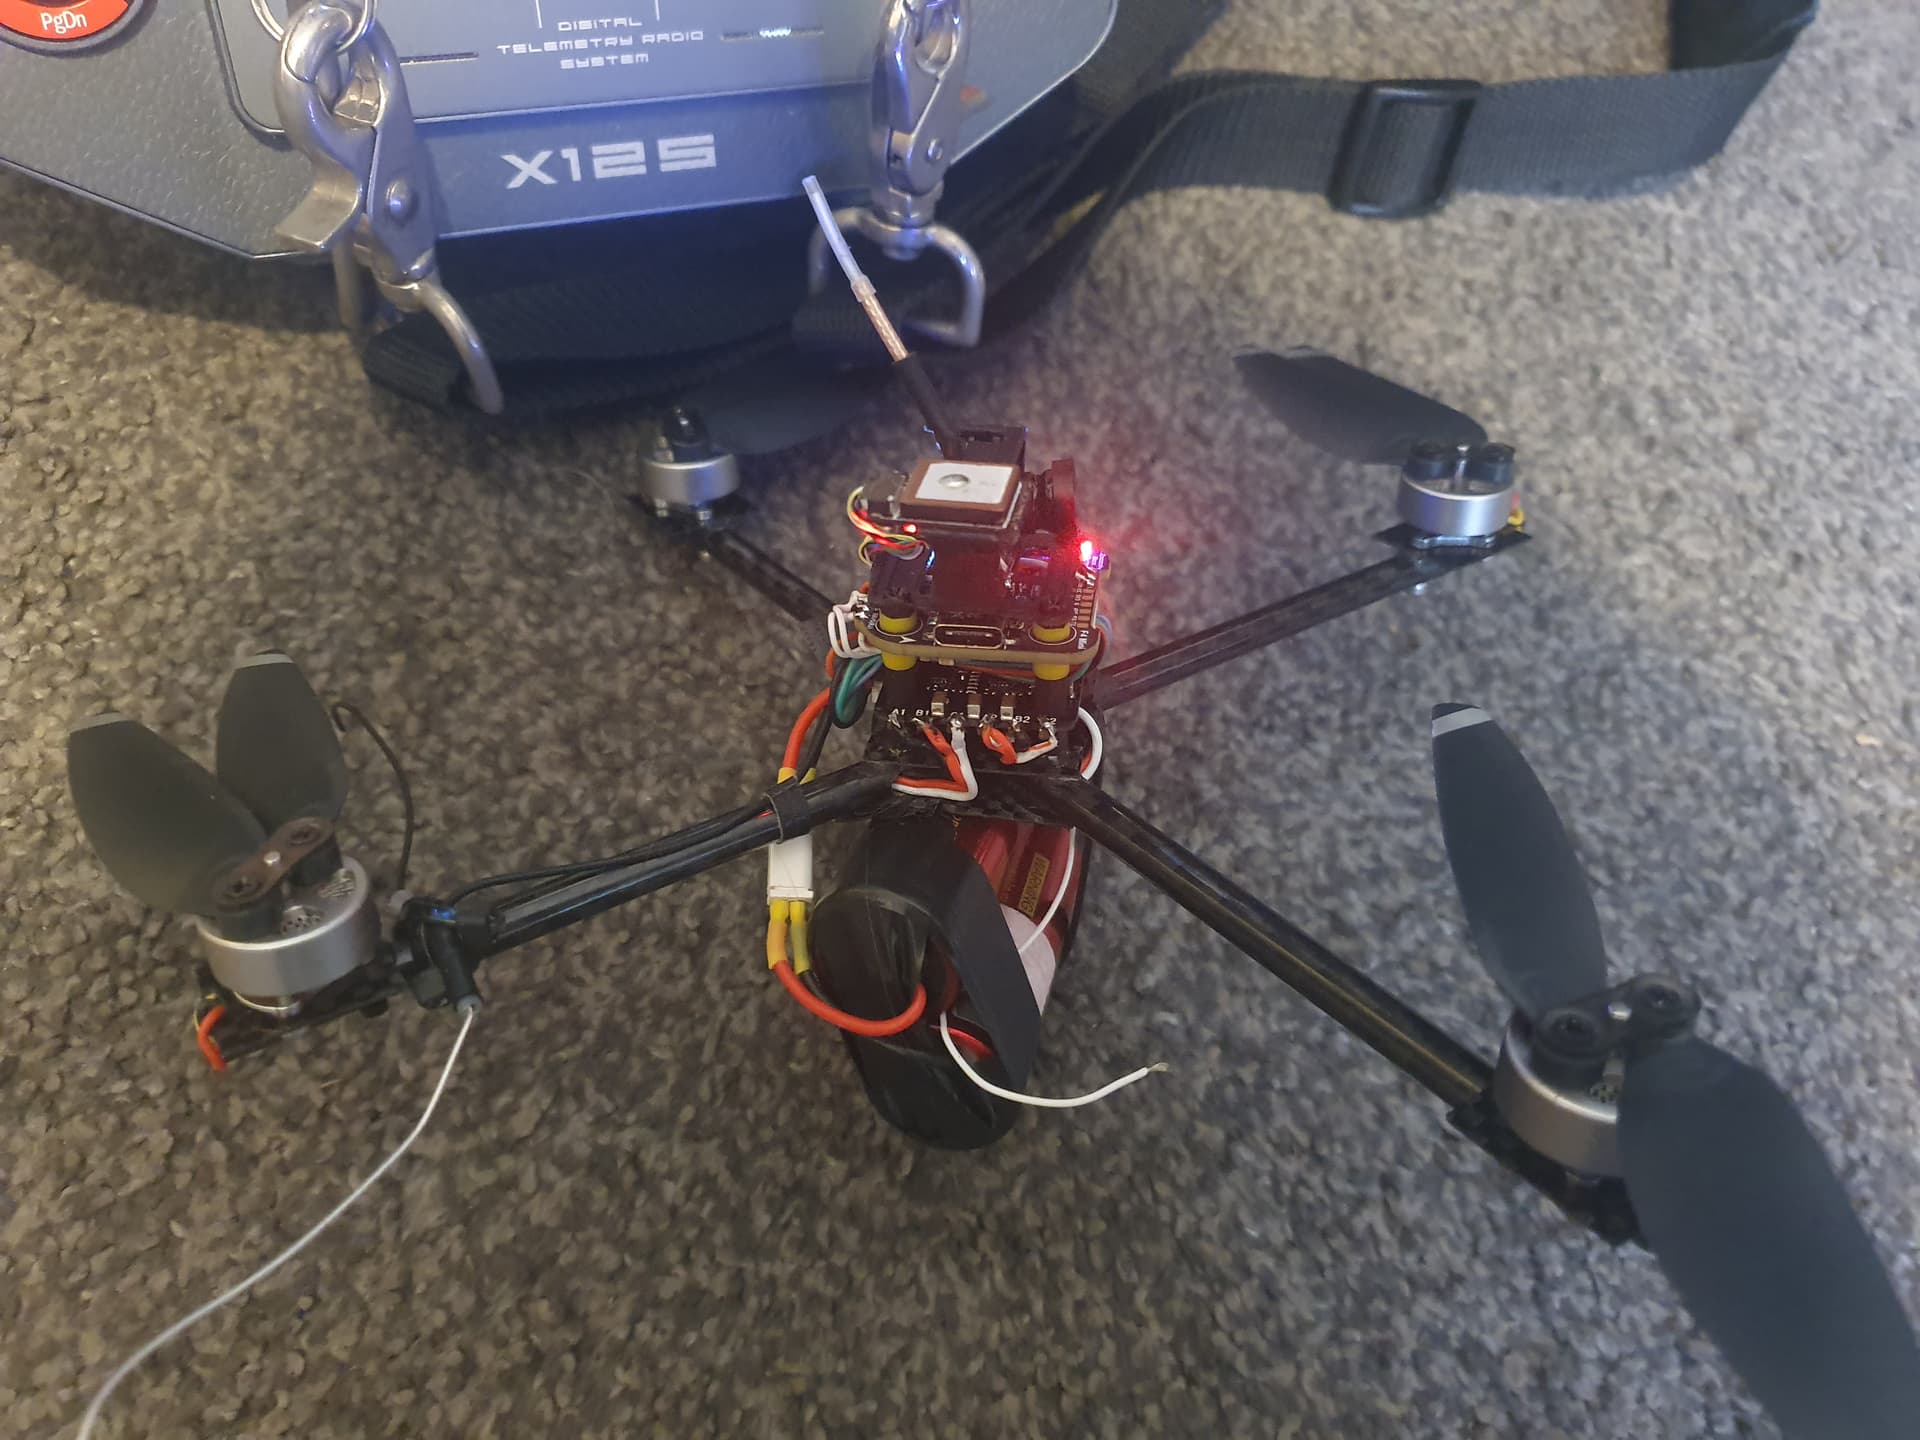
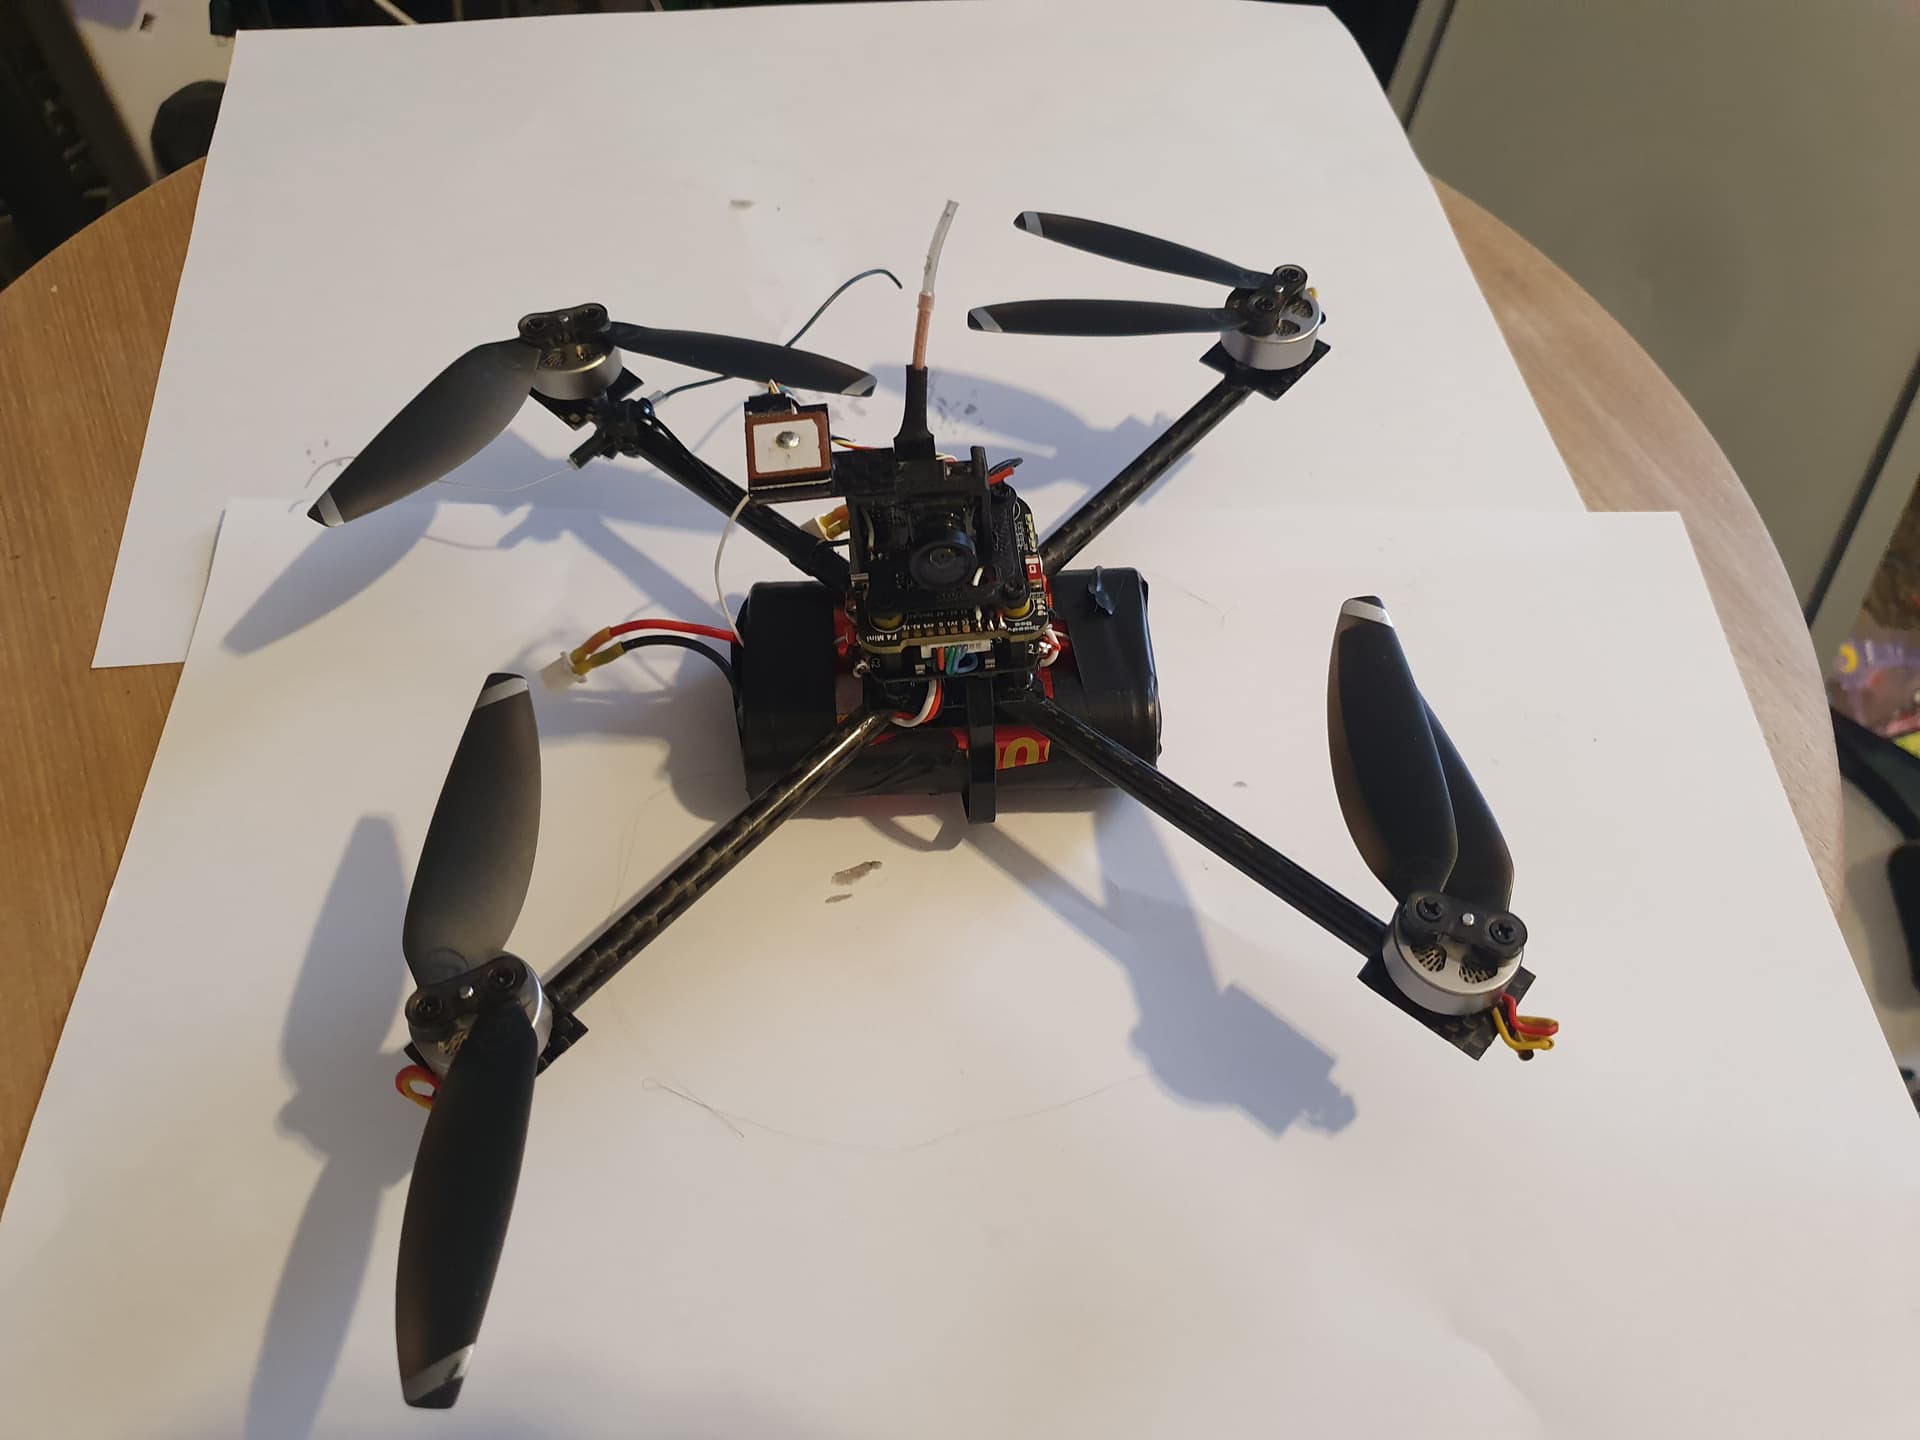
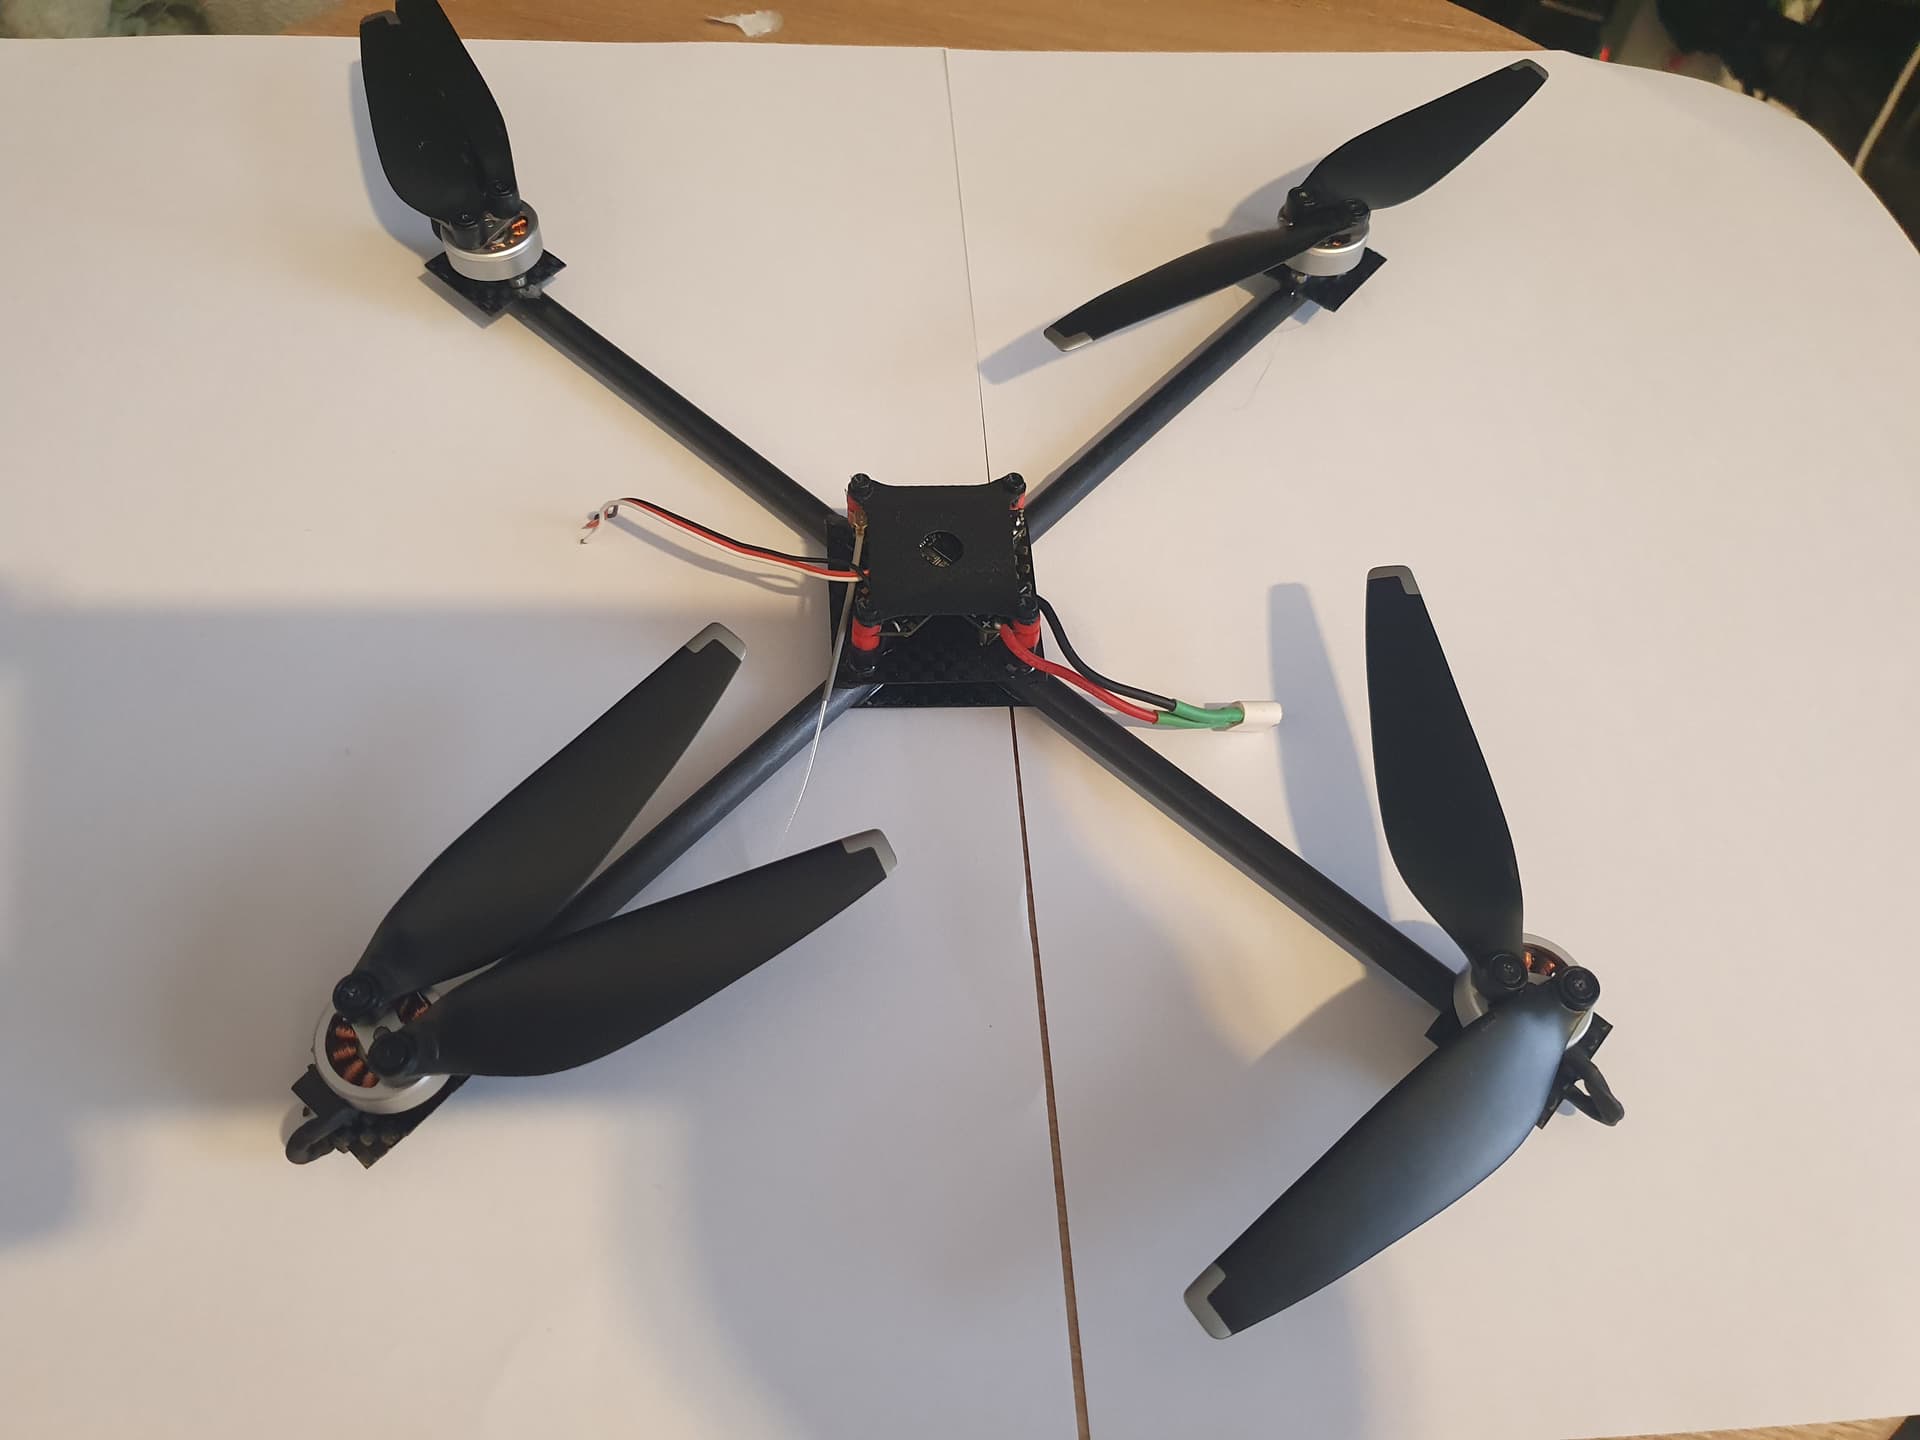
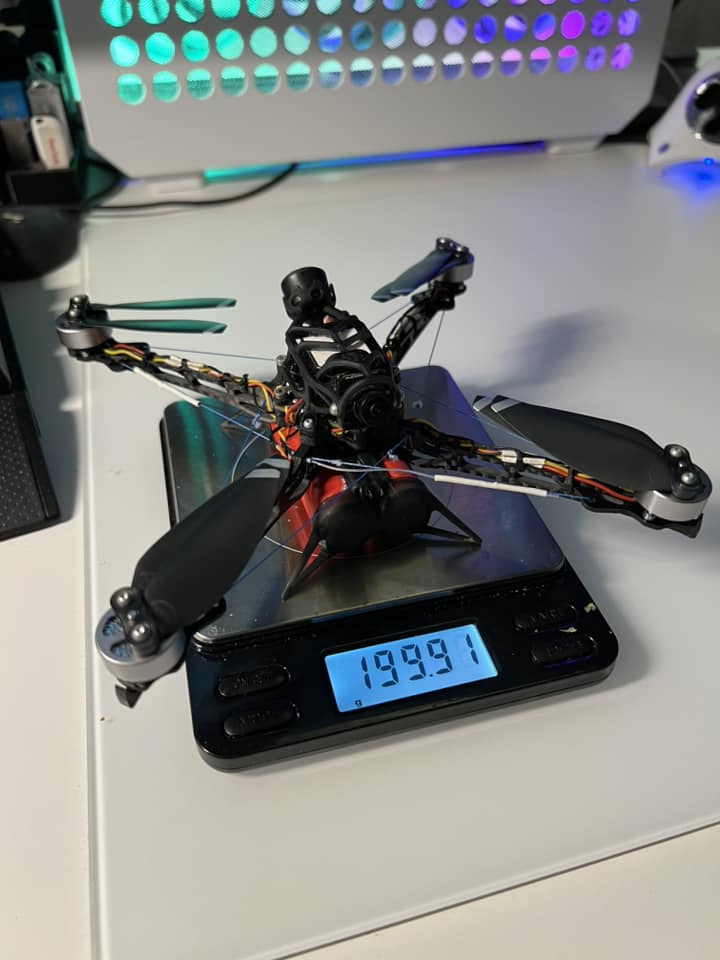
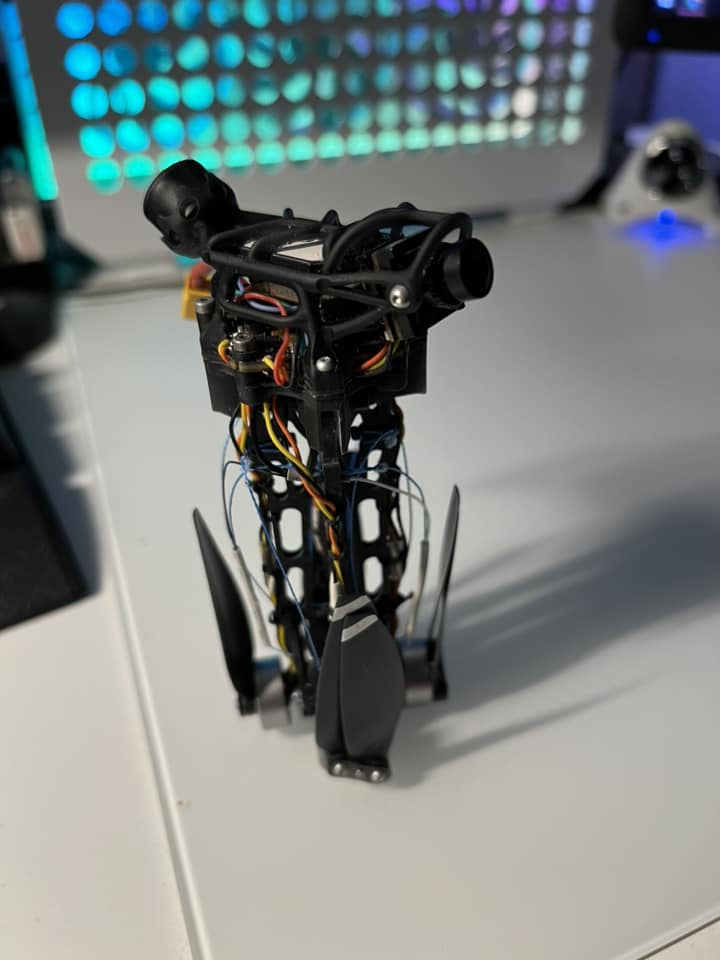
I have transplanted my v1 quad over to its new frame, its now 233g including the 5000mah battery.
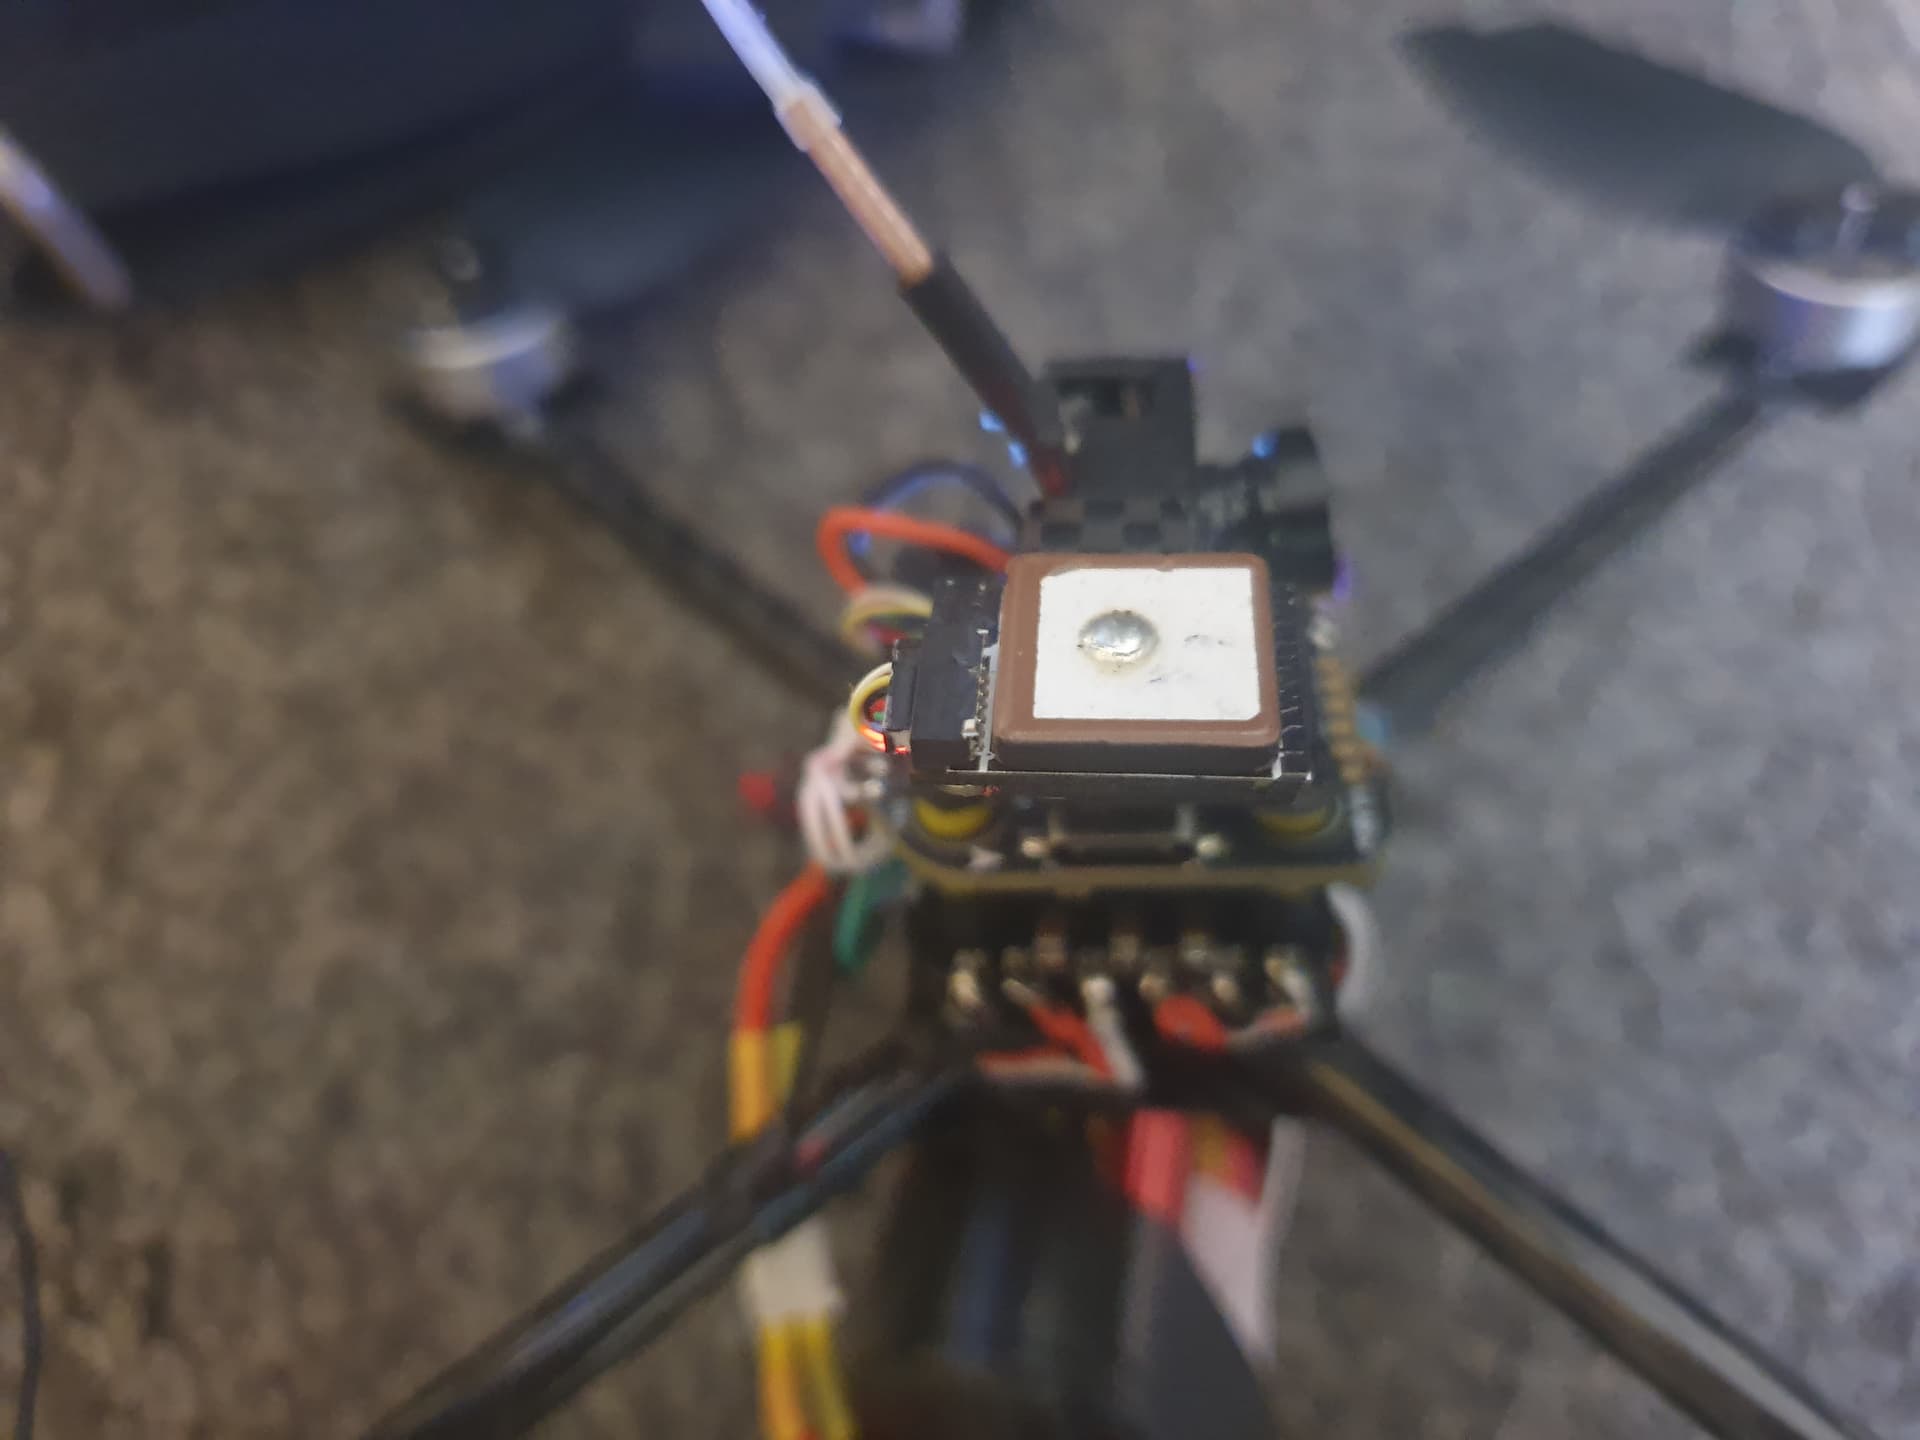
im probably going to have to move the GPS up away from the ESC as I suspect the compass is too close.
3 Likes
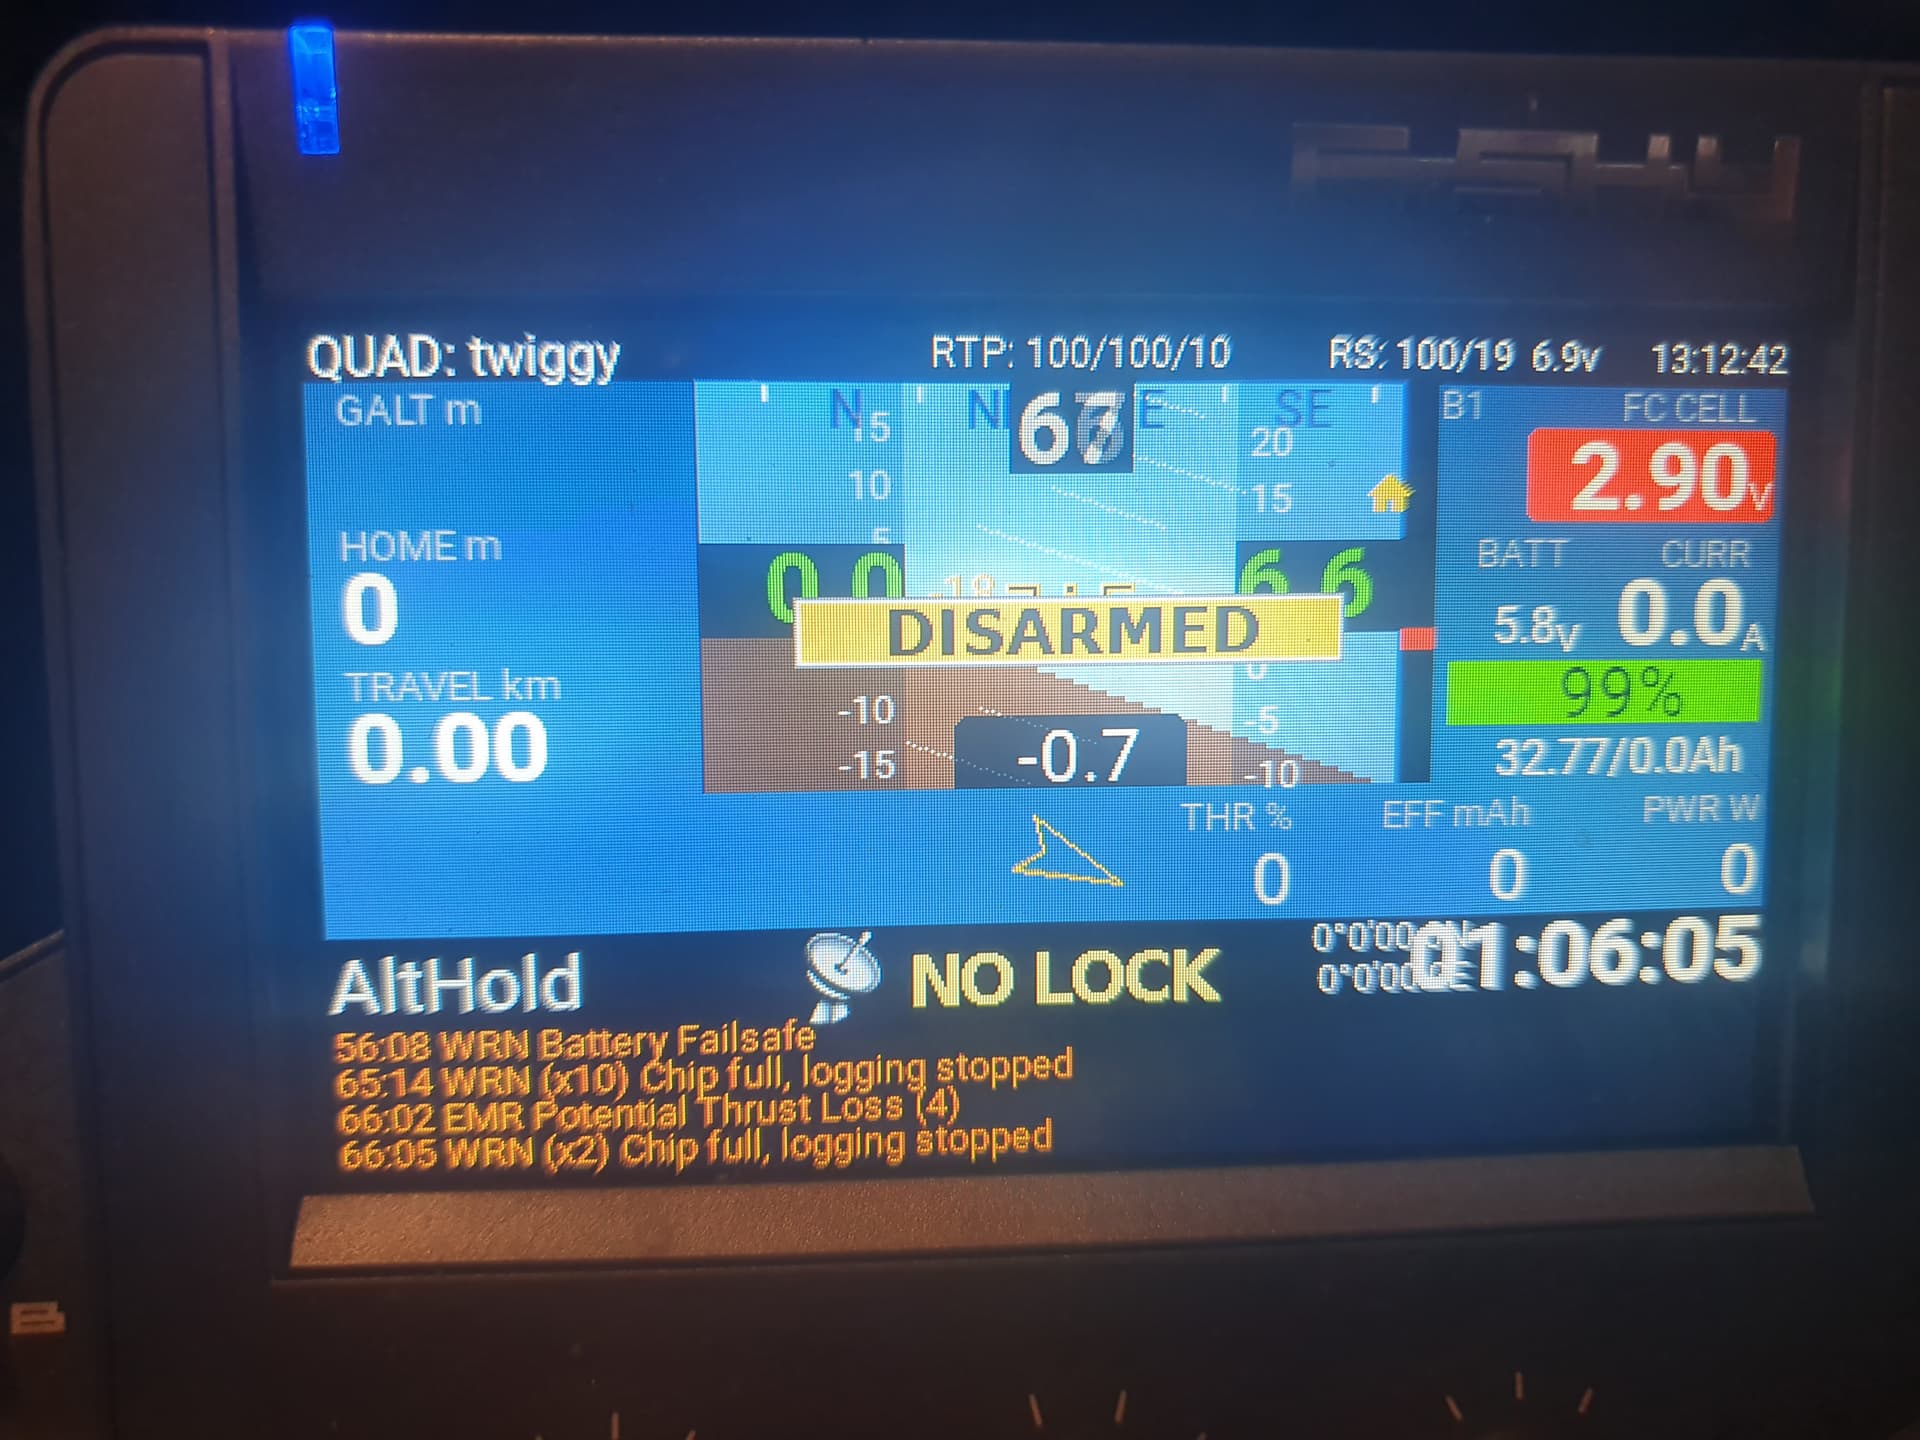
I have just done another indoor test flight with the new frame and new 6000mah battery and got 57 minutes with camera and gps, total weight 242g.

4 Likes
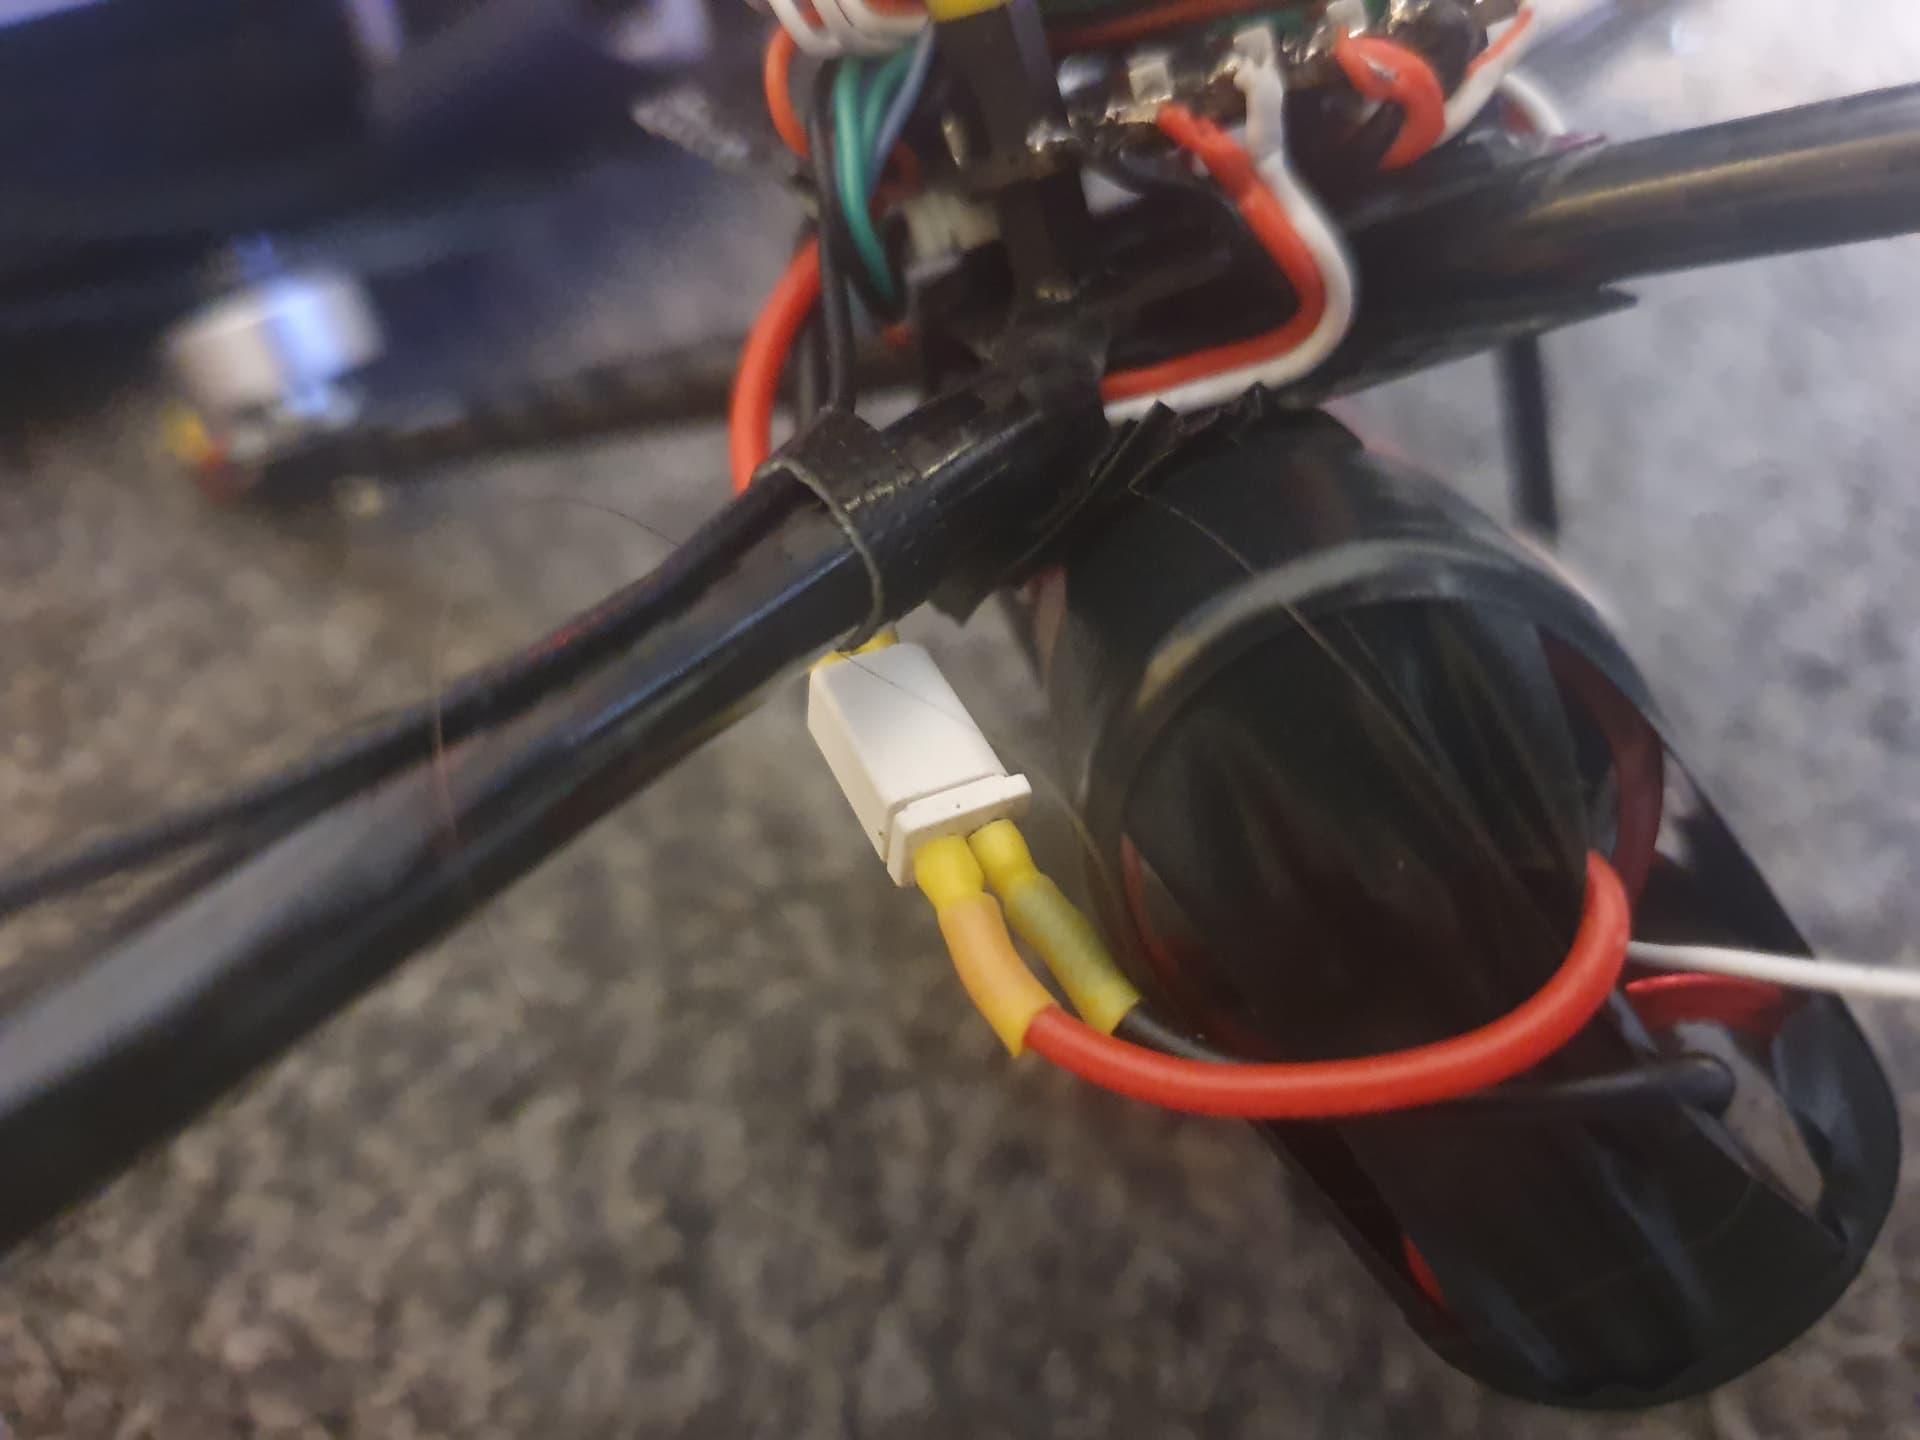
So I changed the Xt30 connector to a BT2.0 connector, reduced the battery wires to 22awg, removed battery balance wires and fitted the extra light GPS bringing the weight down to 233g
The first 1 hour sub 250g Ardupilot FPV quadcopter
5 Likes
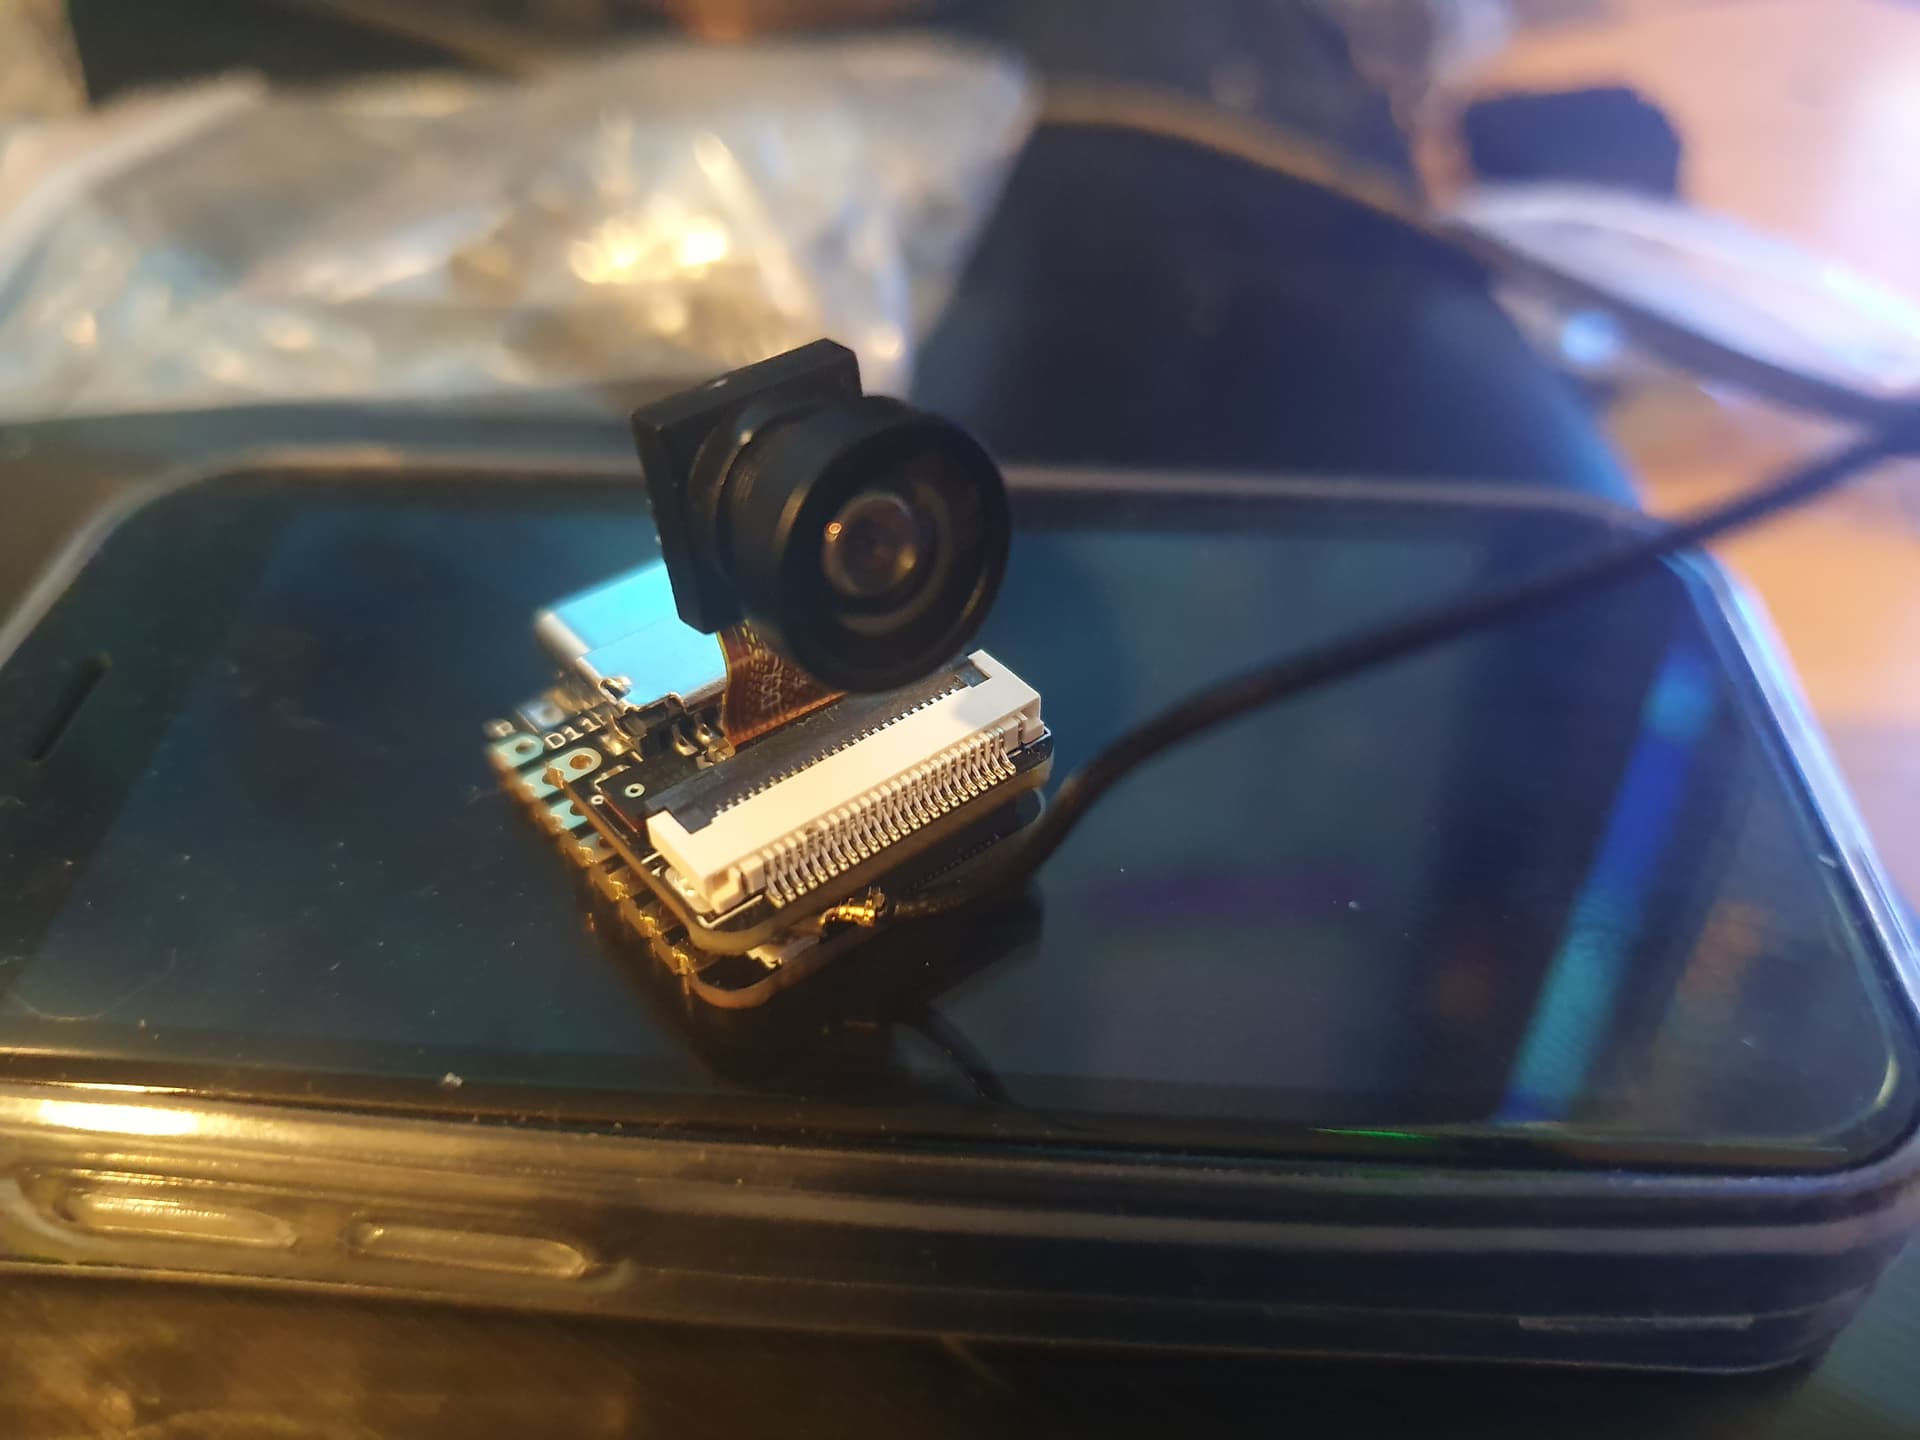
Some progress on the video system,
Its only 4.7g with its antenna.
I have the packet injection video software running on the esp32 I just need the ground station operational.

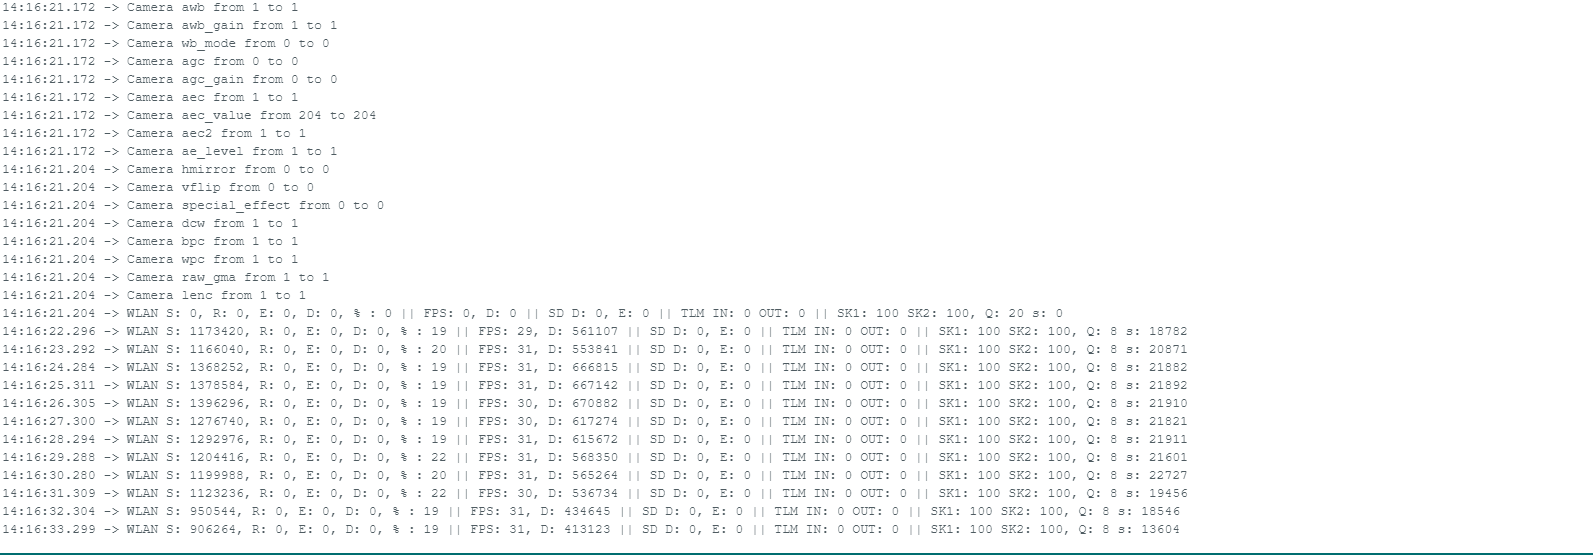
3 Likes
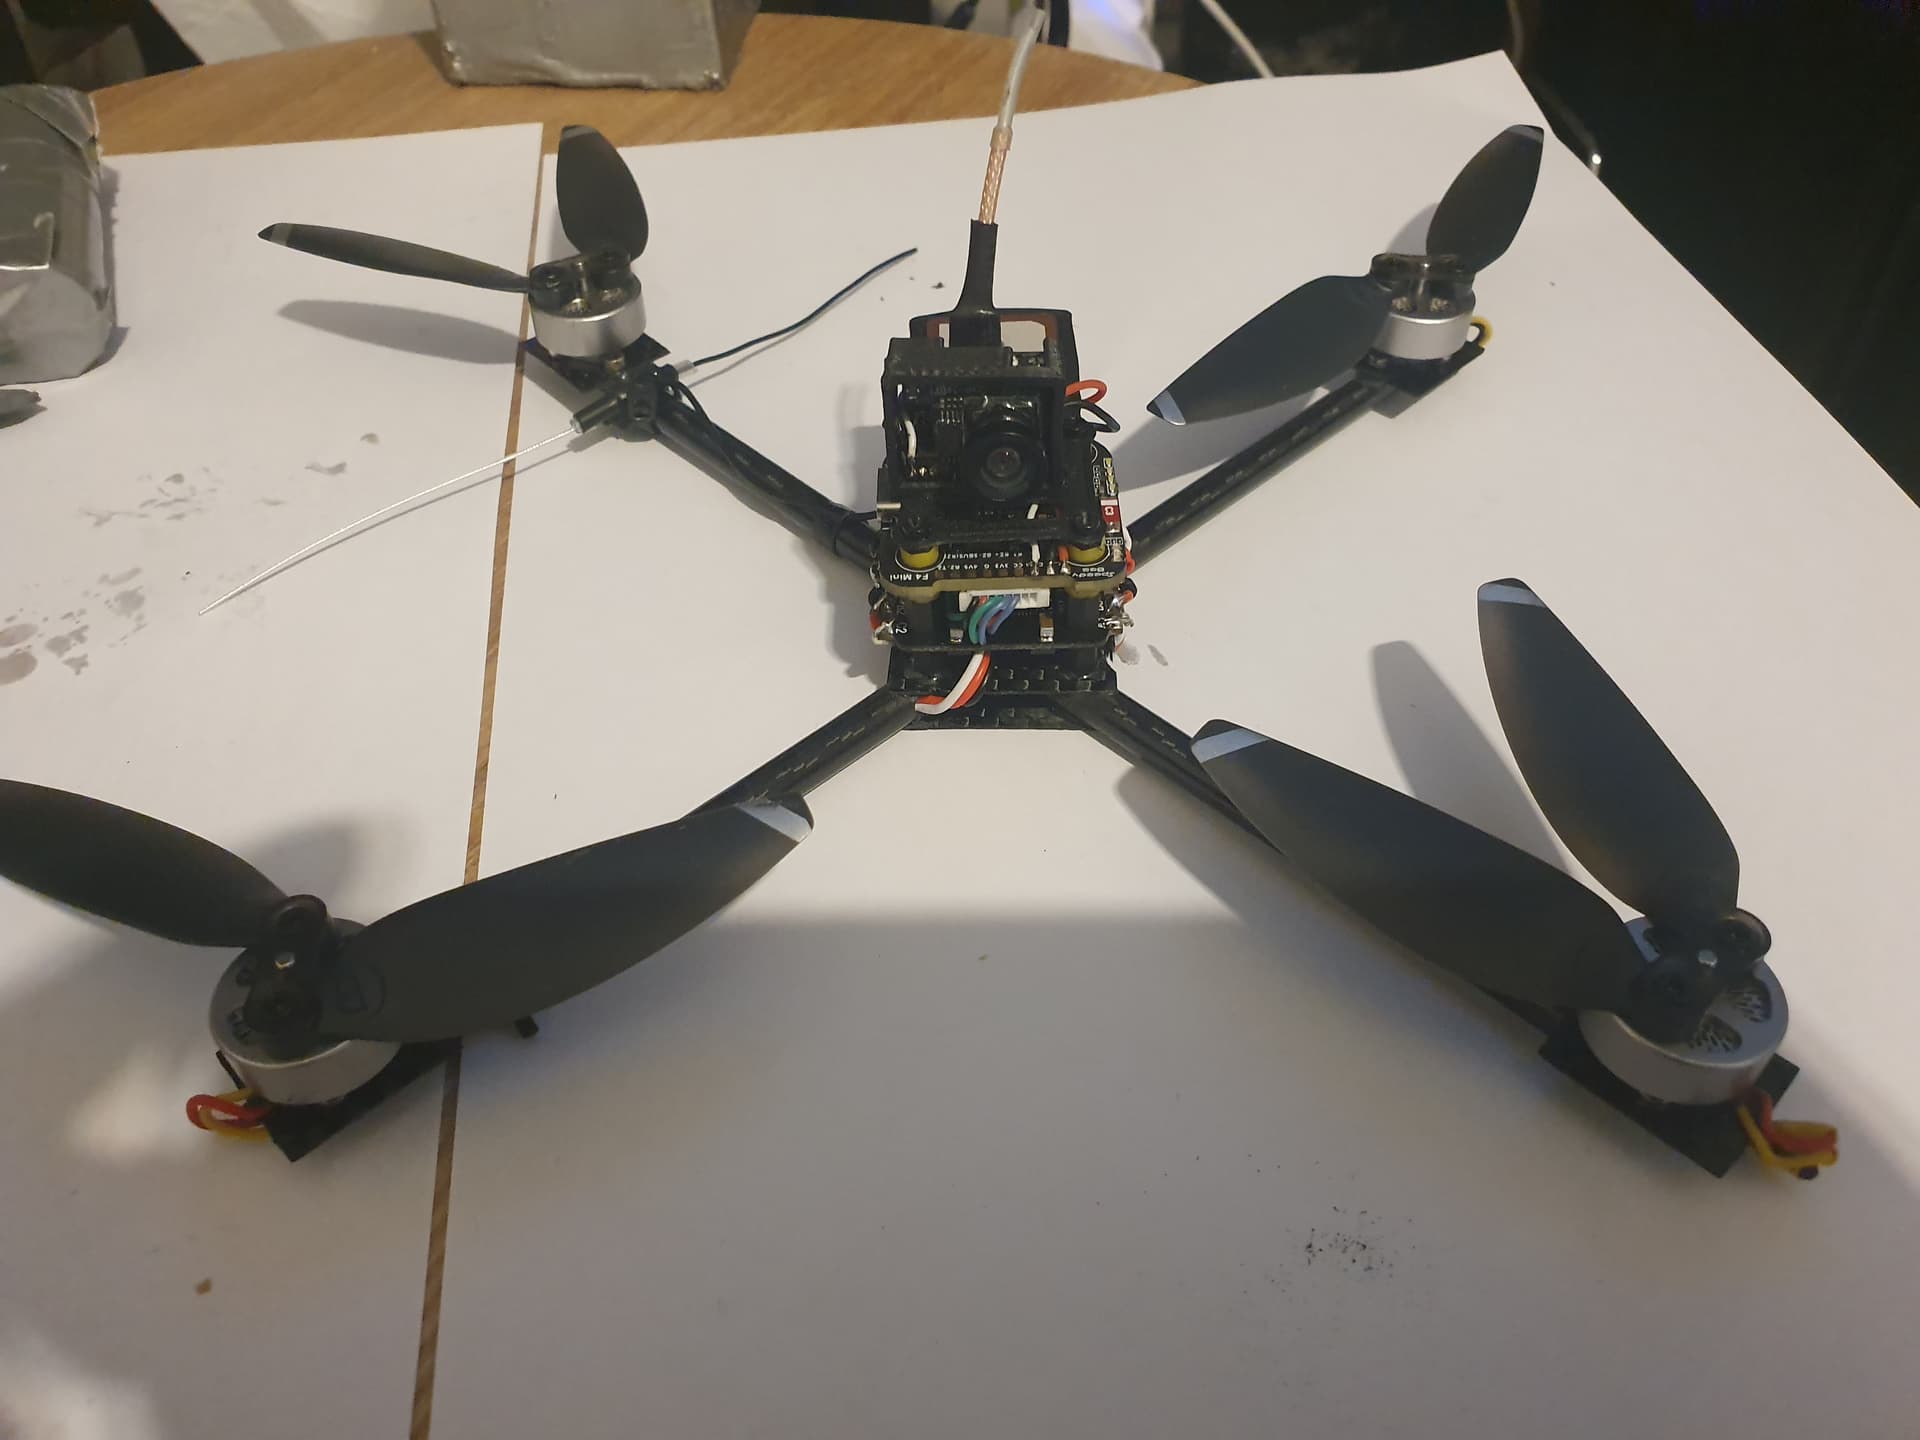
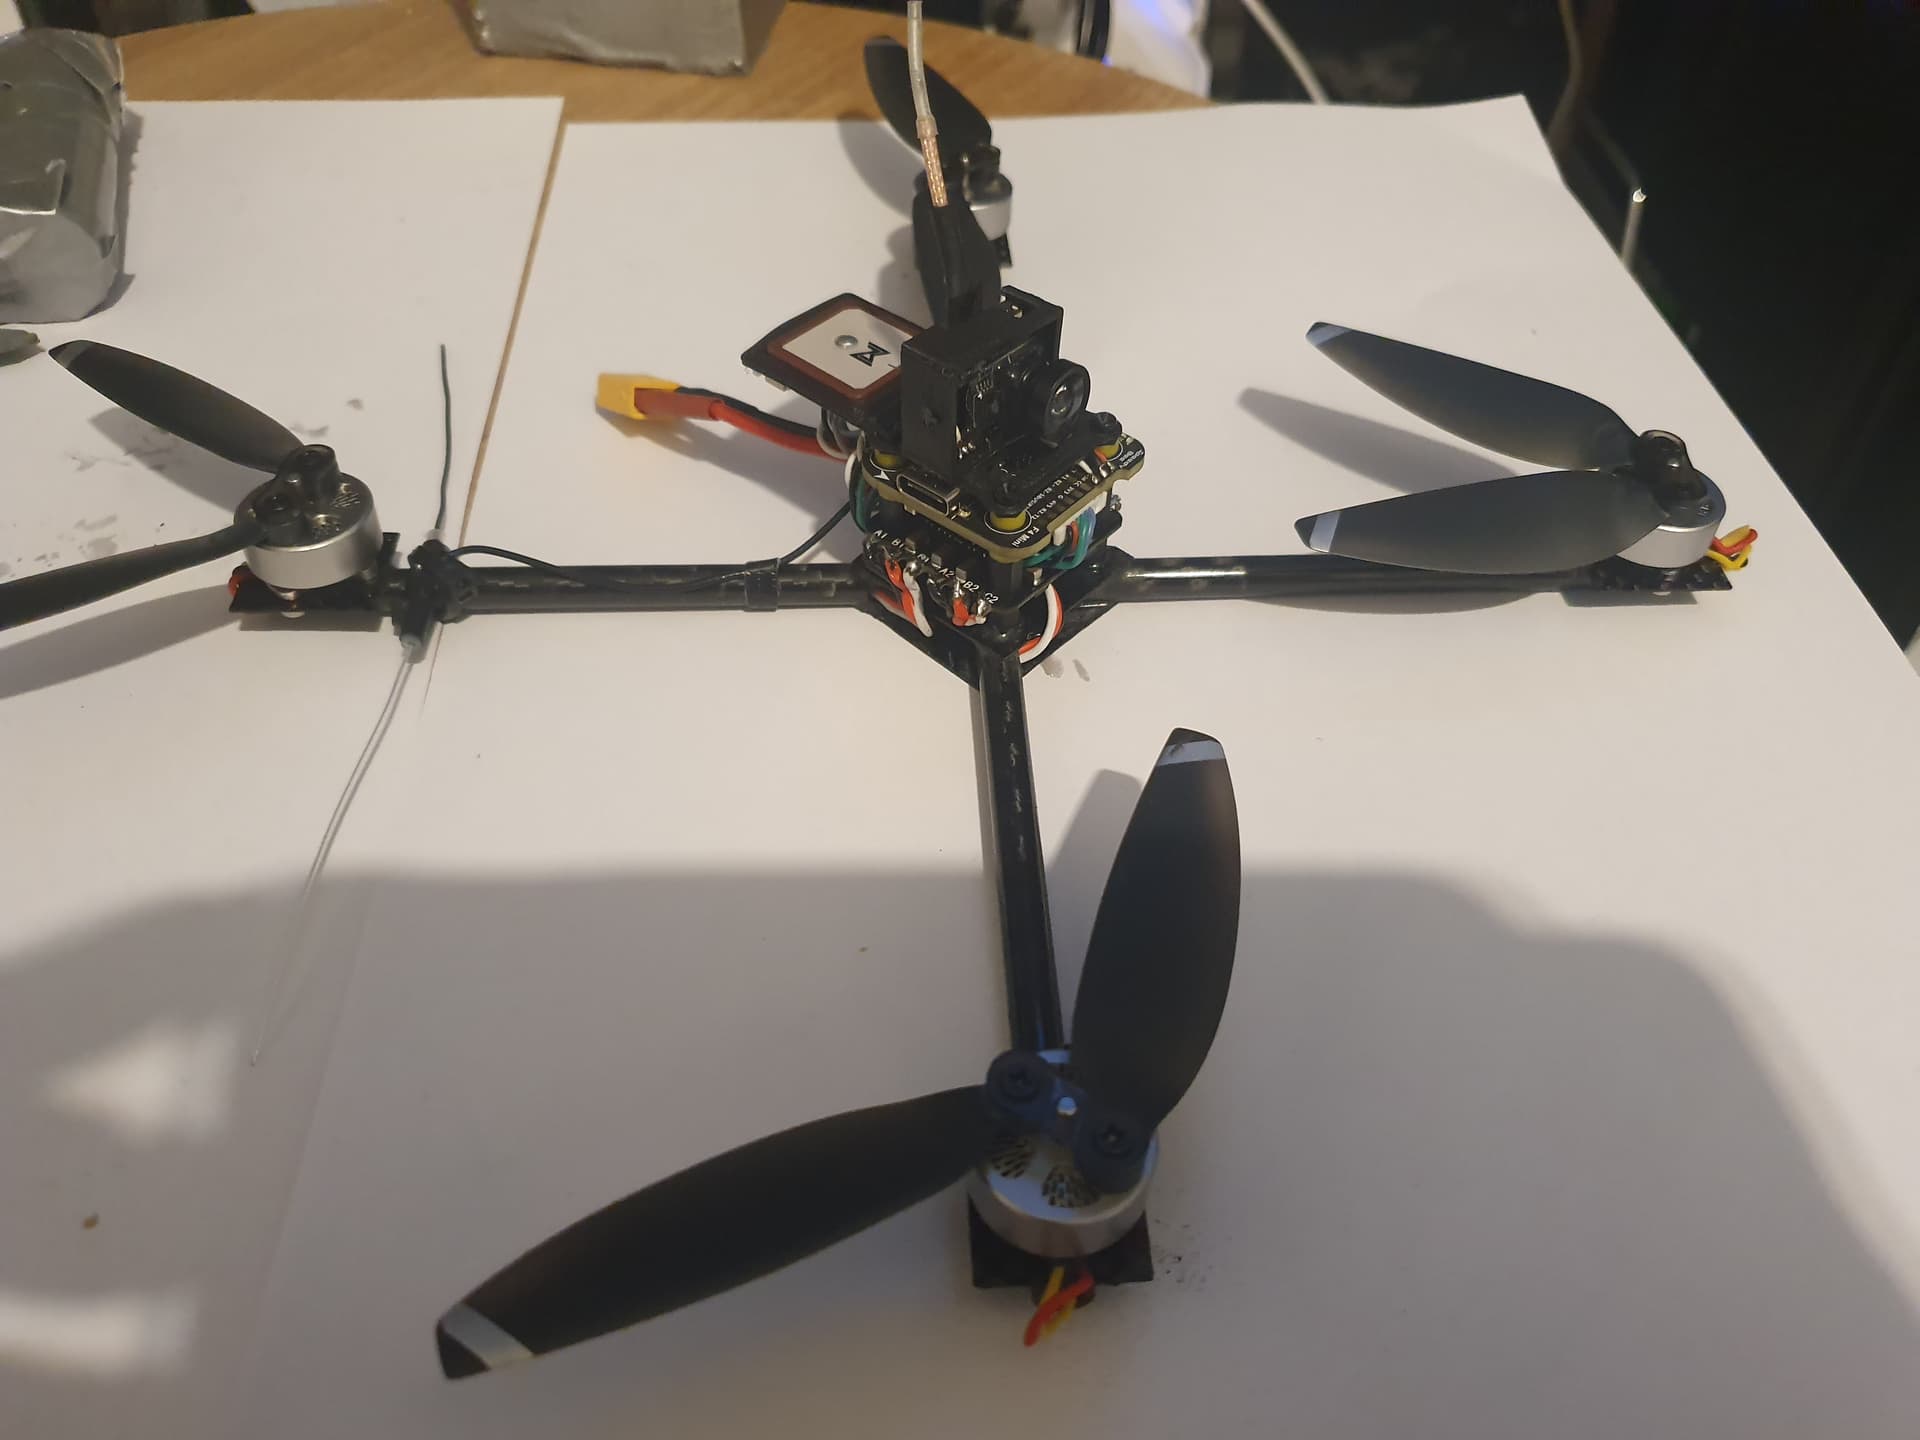
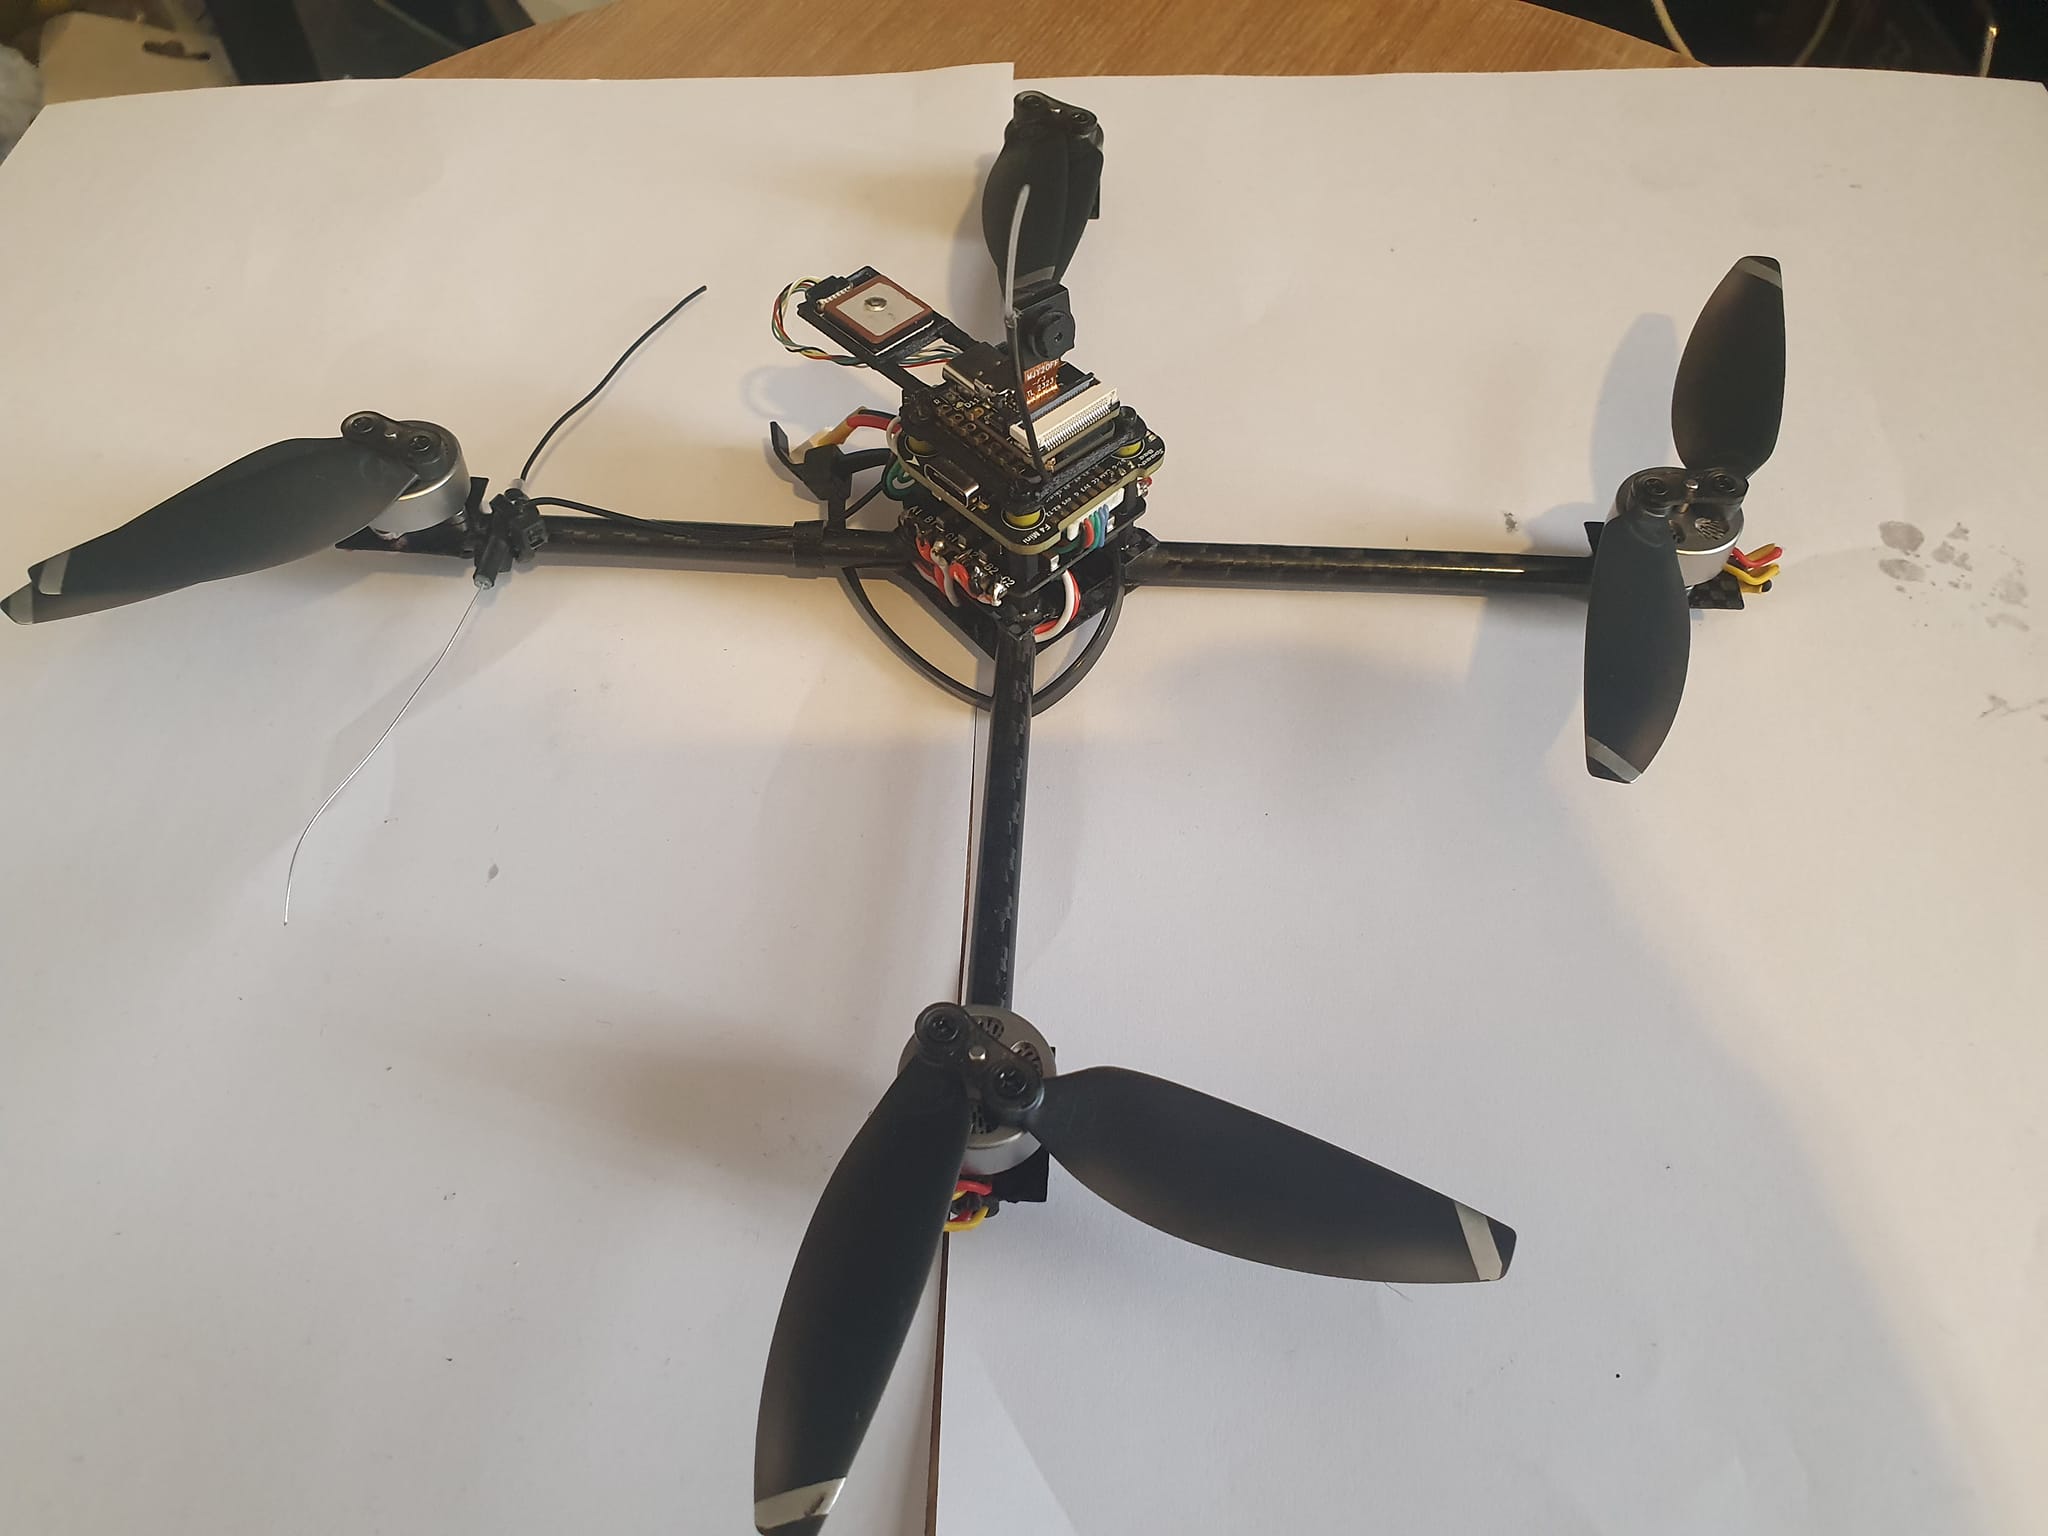
The v2 is almost ready for flight testing, just the motor wires, GPS and camera to get fitted. It looks like its going to be around 60g when built. I have inverted the motors to minimise the drag from the arms, this should get me a few more minutes.
2 Likes
Hello GeoMuir
That’s a wonderful time for a nano drone. Let me take a moment
to appreciate your efforts and sharing the details with the community.
I personally have worked on nano drones with a aim to deliver longer flight duration, but also packed with features… like proximity, altimeter with lidars, gps, telemetry, camera with analog transmission, and ofcourse, radio reciver… and a battery of 2s 4000 mah lion and achieved about 25 to 28 mins of flight time. I would list all the exact parts I used If needed.
However I have never tried to fly the stripping off all the extra features that are not necessary for a stable flight… may be I could have achieved about 35 mins with out them. Efficiency of parts I used is a big question tho. But 50+minutes is really good, I can say it from my experience.
Also, I designed and printed my own frame to reduce weight compared to carbon fiber frames… I could help you with that. I design then on Onshape, will share the design soon. Or you may also reach out to me at jparun36@gmail.com.
1 Like
I looked at 3d printed frames but they all worked out heavier than carbonfibre. With the 0.5mm plate with the ultra light 6mm carbon tube I can build a 250mm quad frame that weighs only 9g. weight is key for long flight time, my quad looses around 5 minutes for every 10g of weight I add.
1 Like
That’s true, may I know if the weight is of only the carbon frame or the other mount included… And what are the dimensions of the frame?
From the picture I guess, it could be 180 mm by 180mm for that 5 inch props.
1 Like
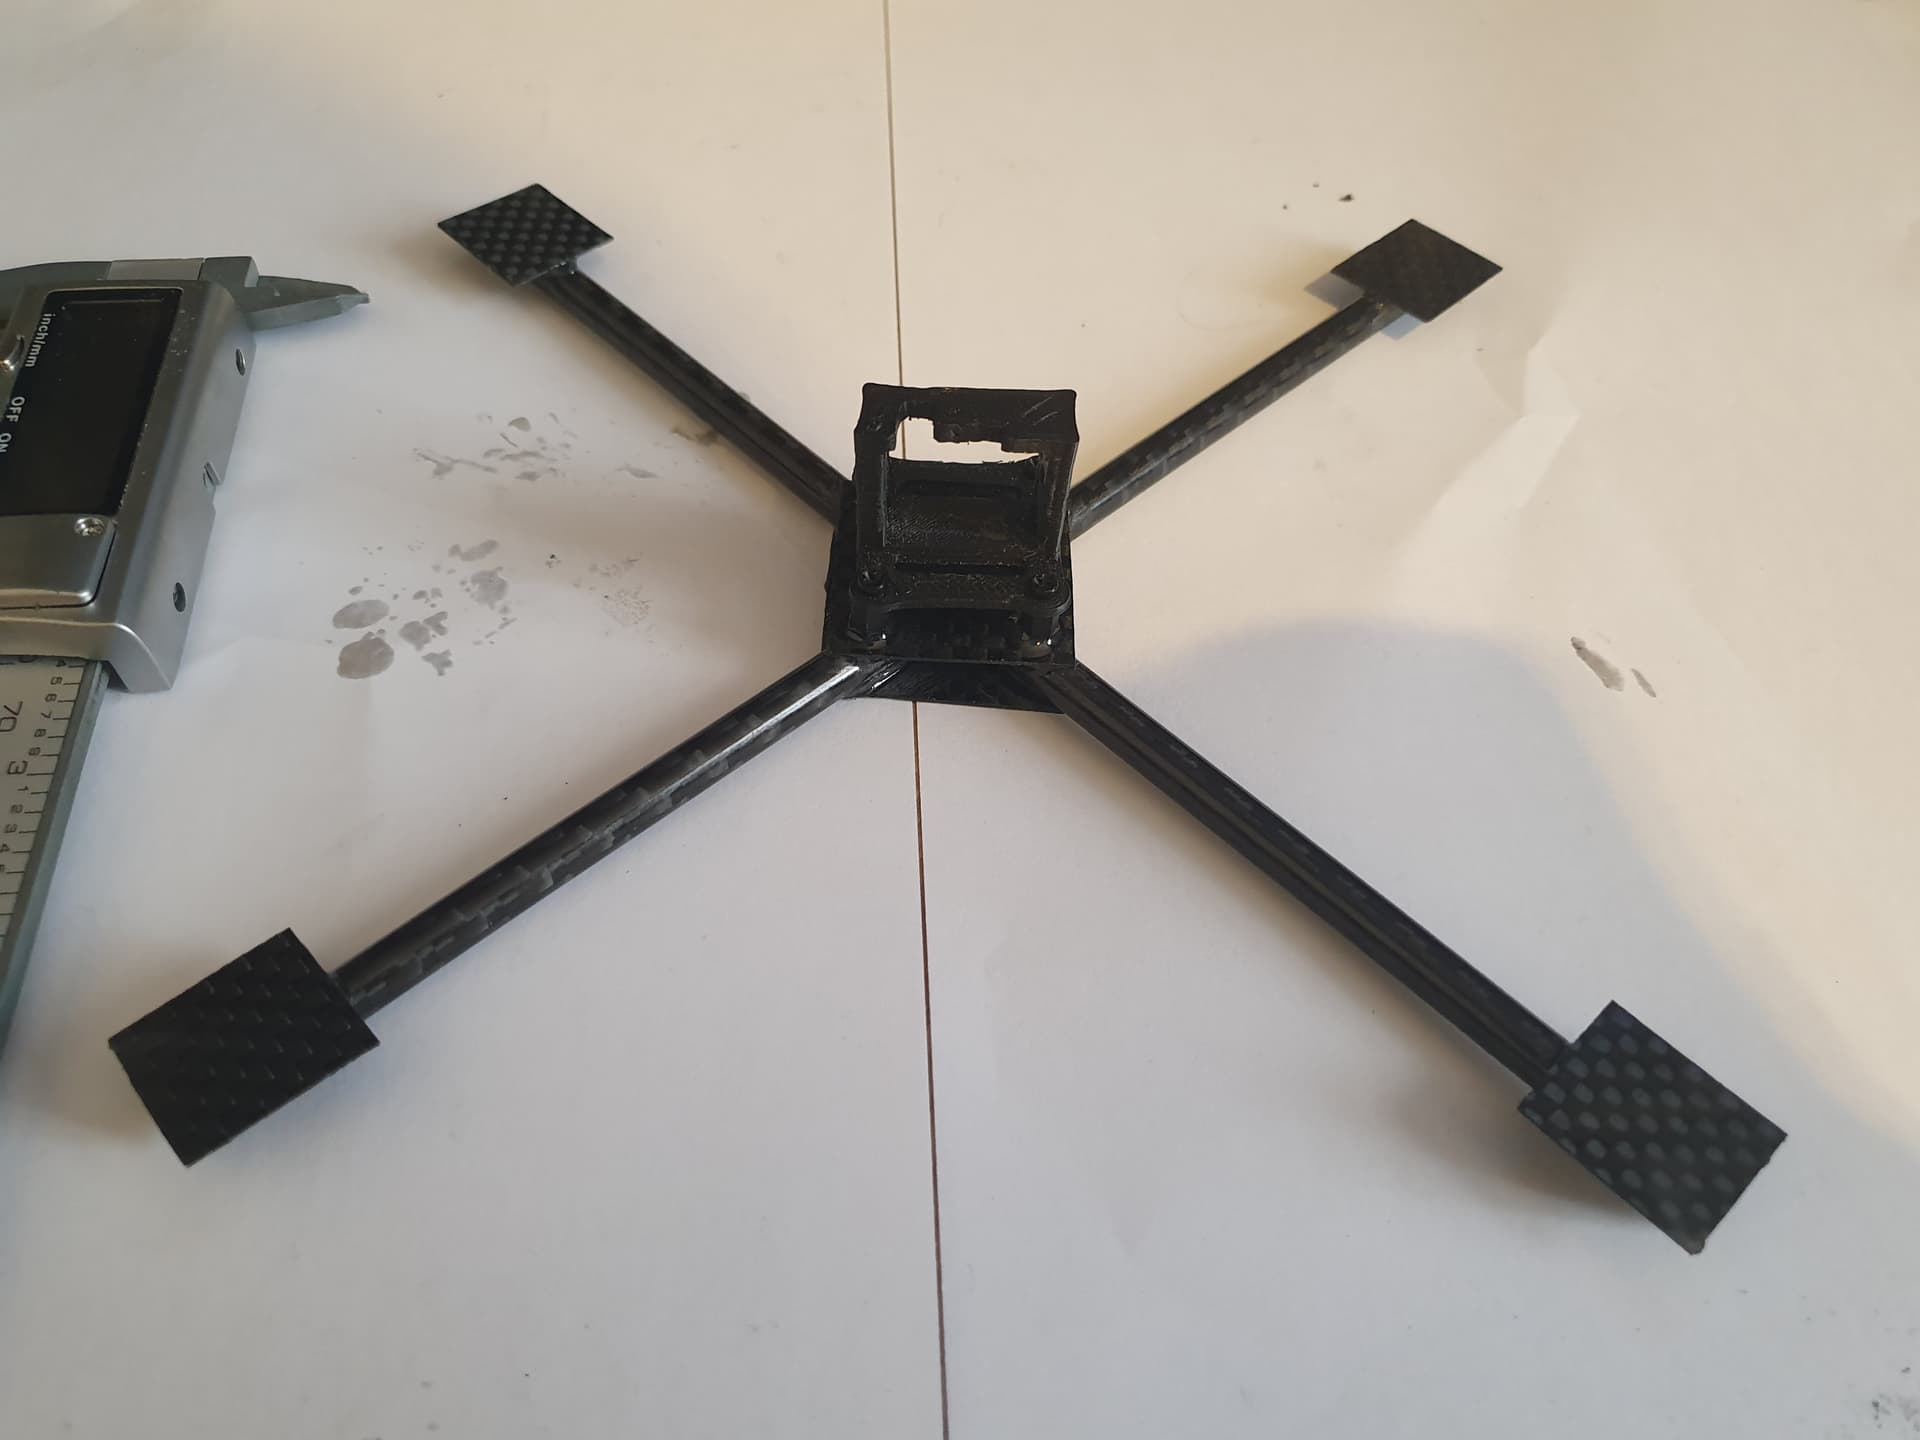
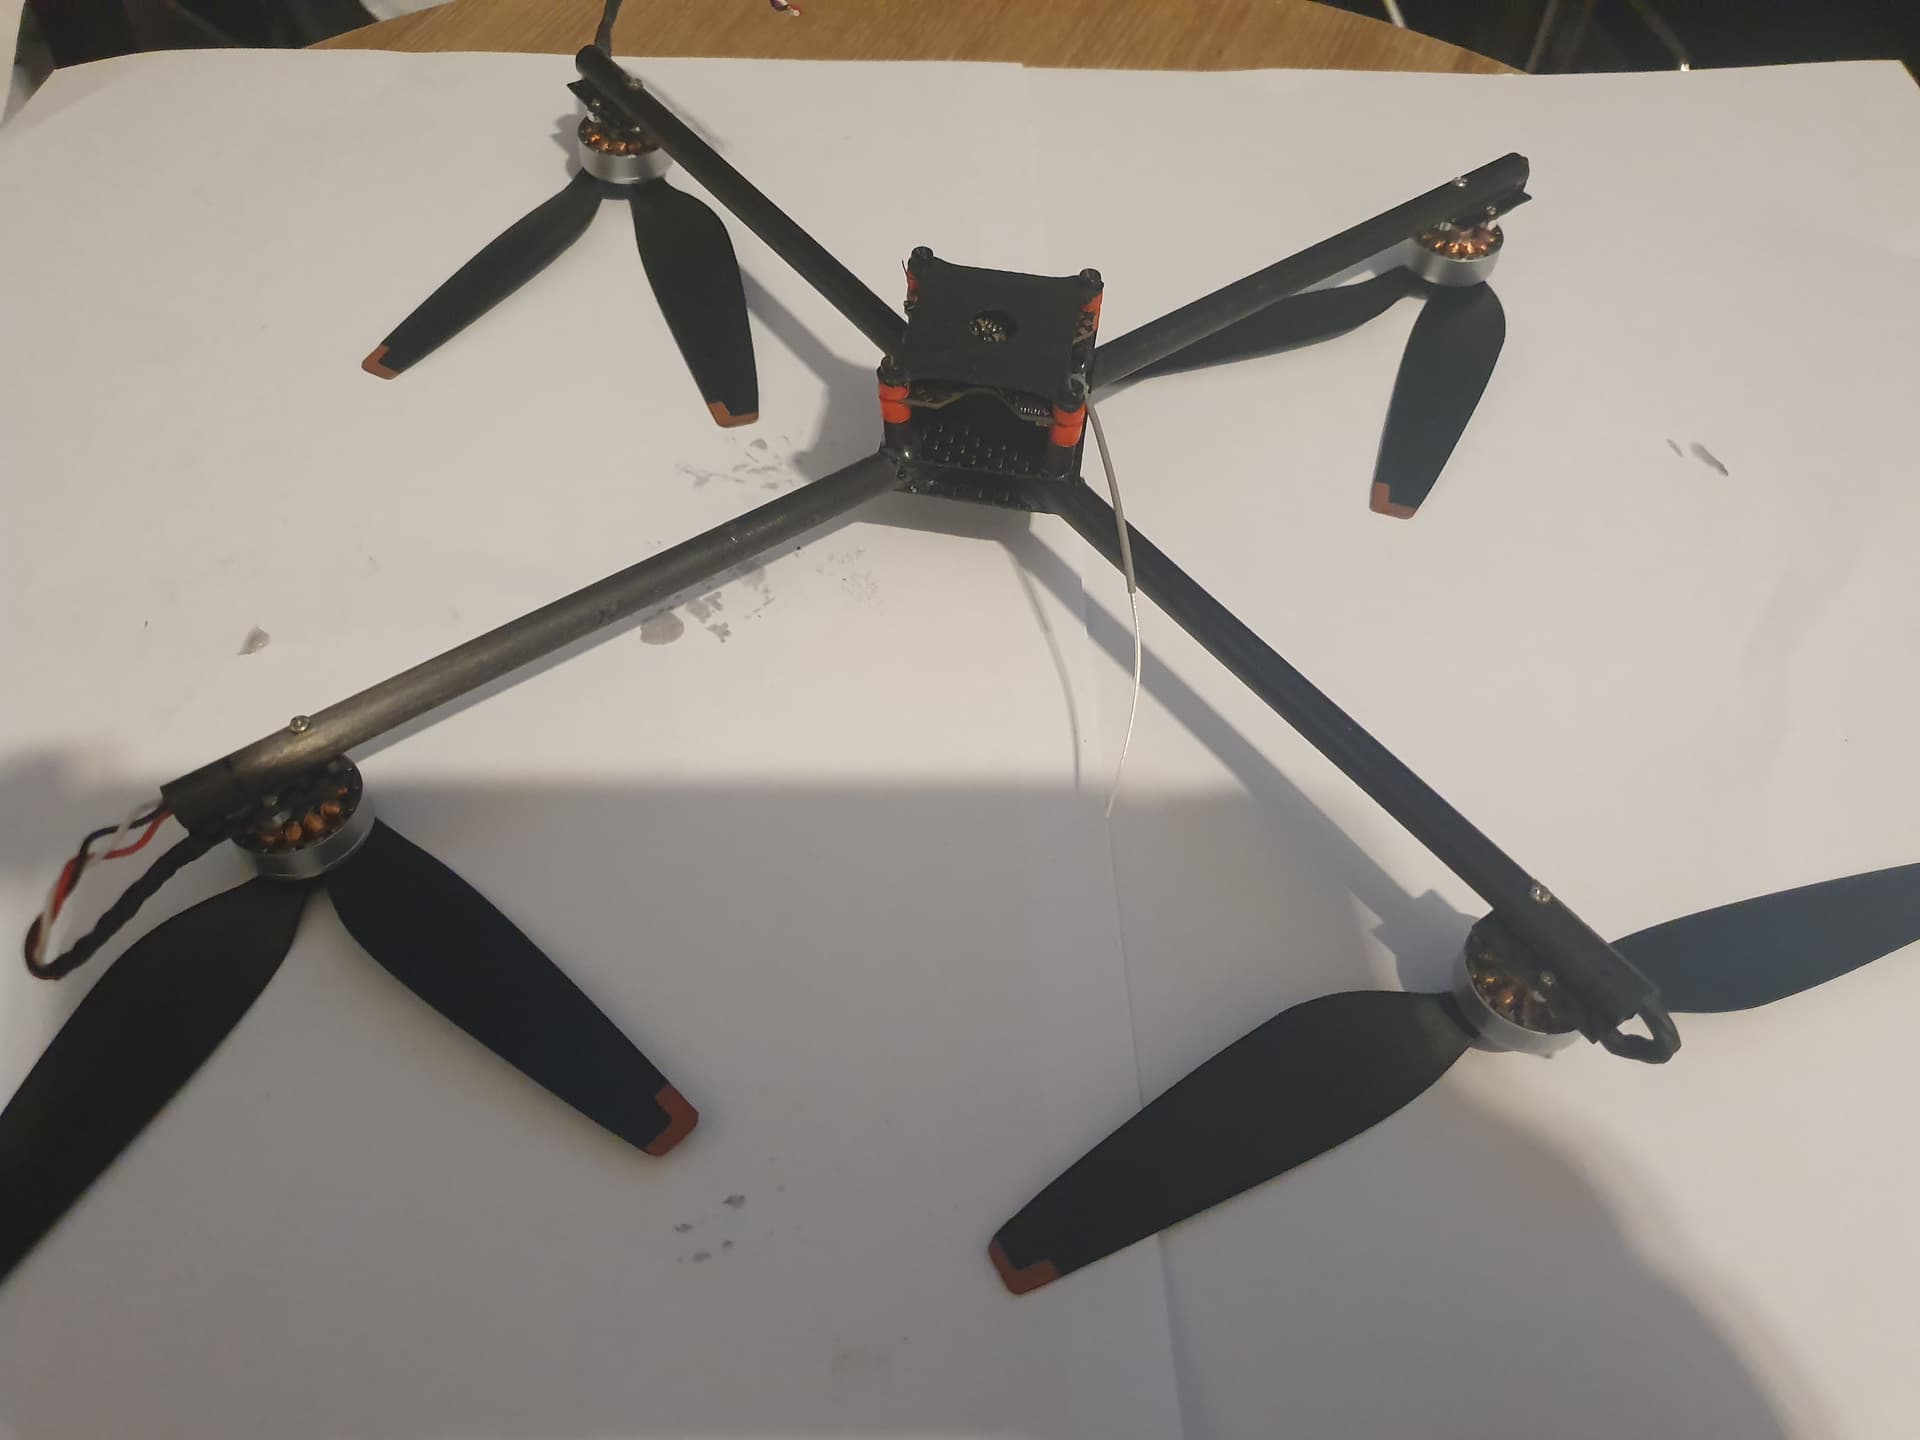
the v1 with its woven carbon is 220mm at 17g, that’s the 2 centre plates,4 motor plates, 2 carbon tubes and the epoxy. The only other parts of the frame are the m2 nylon stand-offs that probably weigh another gram or so.
The v2 with its ultra light carbon is 250mm at 9.8g, its getting 6 inch propellers and motors from a dji mini 3 so I had to make it a little bigger.
2 Likes
Digital video is working on the bench with its new camera lens, I will get it on a vehicle for testing soon, the latency is really impressive.

2 Likes

It looks great. its a photo of the screen, I tried to record using a HDMI>USB but its
compression makes it look like minecraft.
You can see the video compression with the things like the grass and walls but all the edges are quite sharp. You can easily see the telephone cables.


3 Likes
I’m having issues with the UFL connector on these little esp32 boards basically the vibration is causing a bad connection, in the second video when I jam some plastic between the boards to hold the connector down it’s much more stable so im going to glue or solder it down for the next test.
its not got an IR filter at the moment so the sun is extremely bright and there is a lot of purple, the cheap hdmi capture is also adding a lot of pixelation.


3 Likes
I have built a new v2 frame, basically having the propellers inverted was going to cause too many issues and one of the motor plates weren’t totally level, so I scrapped that frame and made a new one. I might do the inverted build for a v3 but i don’t think it will improve efficiency more than 3 or 4% especially with such thin arms.
I also fed the motors through the top plate into the arms, this should be much stronger and looks much neater. The wire coming off it is for flashing the built-in receiver
first test flight didnt go so well, basically there was a lot of vibration and on closer inspection I could see the blade tips weren’t level on 2 motors when they were spinning, so either the motor or propellers were faulty. Moving the propellers around didnt really do much and neither did a second set, so 2 out of the 4 mini 3 po motors were defective. To fix this I have ordered another 4 from an equally questionable seller along with a set of genuine dji propellers from DJI to give them the best chance of working.

4 Likes
The ESP32-FPV is pretty much working now, basically all of my problems were caused by a combination of the terrible sensitivity of the ar9271 wifi adapter I was testing with and me breaking the ufl connector by changing the antenna too many times.
I have finally got it working with a modern realtek 8812au wifi card and the signal is night and day. I’m getting a better signal through a wall with this card than I was getting sitting next to the other one.
To install it on a pi, follow these instructions
sudo apt update && sudo apt upgrade
sudo apt install libdrm-dev libgbm-dev libgles2-mesa-dev libpcap-dev libturbojpeg0-dev libts-dev libsdl2-dev libfreetype6-dev
sudo apt-get install -y aircrack-ng
sudo apt-get install dkms
sudo apt install -y raspberrypi-kernel-headers build-essential bc dkms git

//if using a 32bit OS:
sudo nano /boot/config.txt
add " arm_64bit=0" to bottom of file save and reboot

mkdir -p ~/src
cd ~/src
git clone https://github.com/morrownr/8812au-20210629.git
cd ~/src/8812au-20210629
sudo ./install-driver.sh

config = NO
restart = YES

git clone https://github.com/RomanLut/esp32-cam-fpv.git
cd ./esp32-cam-fpv/gs
git submodule update --init --recursive
make -j4

sudo nano /home/pi/fpv.sh

    #!/bin/bash

    echo "ESP32-FPV STARTUP"
    cd /home/pi/esp32-cam-fpv
    cd gs
    sudo airmon-ng check kill
    sudo ip link set wlan1 down
    sudo iw dev wlan1 set type monitor
    sudo ip link set wlan1 up
    sudo ./gs -fullscreen 1 -sm 1 -rx wlan1 -tx wlan1

save

sudo chmod +x /home/pi/fpv.sh

//to run at startup

mkdir /home/pi/.config/autostart
nano /home/pi/.config/autostart/fpv.desktop

    [Desktop Entry]
    Type=Application
    Name=FPV
    Exec=/usr/bin/bash /home/pi/fpv.sh

save
to install on the esp32s3sense
flash this firmware to the esp32 at address 0x100000
https://github.com/RomanLut/esp32-cam-fpv/files/14732044/firmware.zip
1 Like
I need to get a camera with an IR filter, i cant see anything in daylight.
the video is much better with the new realtek wifi adapter, I havent fixed the UFL connector yet so its still dropping some frames when it vibrates.
it looks really bad by the time its went through the video capture, then edited then compressed to youtube, it looks much better on a monitor.

I changed the ESP32 and added a better antenna thats secured down. Its still dropping a few frames but thats probably all the wifi routers around me.

1 Like
This is such a cool build!
I’ve been tinkering with a small copter for ages and those motors you linked to where perfect for me also.
I can only run betaflight on the TBS podracer AIO but i have a arducopter compatible AIO to go in soon.
I’m only running the smaller 18650GA cells but it should get me about 30min flight times.
That does get me sub 200g rtf with a folding frame though so I’m ohk with that.
3 Likes
nice, what frame is that?
1 Like
